PHOTO OF THE WEEK

Memorial Weekend is more than just camping and BBQs. This is such a beautiful photo I wanted to share it with everyone in remembrance of what this weekend is all about.
Memorial Weekend is more than just camping and BBQs. This is such a beautiful photo I wanted to share it with everyone in remembrance of what this weekend is all about.
 This is some of the great stuff I've picked up for my craft fair table so far. Almost all of the second hand items you see I've picked up for under $50! I will mix in a few more things from around the house and I should have a beautiful, coordinated booth of products.
I picked up some antique drawers, baskets, silver trays, glass bowls and an old Samsonite piece of luggage to display everything in. I found a cute (and fairly comfy) compact chair; a mirror for customers to try on jewelry; and a chalkboard for $2 to make a welcome sign. I also picked up a blue glass vase for $1 and a few dried flowers for display. With all the beautiful fabric I will make a table cloth and a fabric banner with my shop name on it. I'm using the extra scraps of fabric to make other projects such as the gift tags I posted Wednesday. I'm very excited this is all coming together!
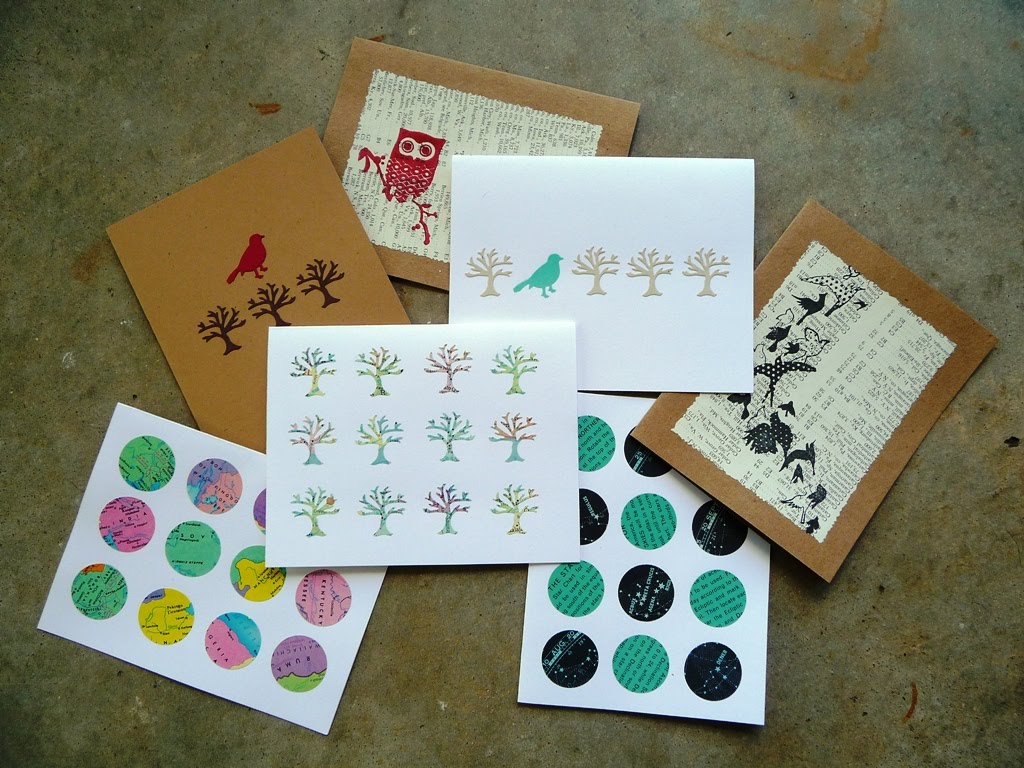
I haven't written much on the blog this week because I've been super busy crafting with paper. It started last weekend when I wanted to make product tags for my craft fair out of some old paper grocery bags I had. That turned into making gift tags with the extra bags, some cereal boxes I was going to recycle and fabric scraps from another project. Then I picked up an old world atlas at the thrift store thinking I could make something fun. I used the atlas along with some old scrapbook paper to make confetti and note cards. Then I used the remainder of the atlas maps to make bottle cap magnets and paper balls that I will sting to make garland. Its been a productive week. Once I figure out packaging and pricing I'll have some of this stuff up on Etsy soon.
Oh yeah, I also saved all the left over scraps from cutting out the world atlas and if I get really motivated I might make recycled paper out of it so I can do it all over again!


 Egg Crate Sewing Storage
  Picture Frame Shelving
  Cookie Sheet Memo Board
 Tin Can Organizers
 Mason Jar Organizers
 Vintage Suitcase Storage
 Uploaded on July 12, 2009 by Art·Craft·Thrift
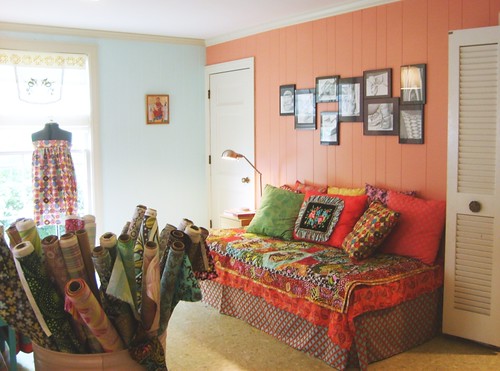
 This is another fun, colorful sewing room that I just had to share. Anne Marie Horner is a quilter and her space definitely reflects her work. Although it’s still bold this color pallet is a lot softer than the one we saw from Jenny B. You can see more fun details and her beautiful fabric collections on Flickr by clicking the photo above.
As I mentioned earlier this week, I haven’t actually worked much in my office since moving here because it’s a small space, usually cluttered with projects, and I haven’t felt overly inspired to be in there. So, I’ve been slowly fixing it up. I have a new color pallet in mind and an overall look I want to achieve down the road. Right now we are renting since we recently relocated half way across the country so I share our office with my boyfriend and the cat. Eventually I imagine having a whole room of crafting heaven to myself when we buy a house down the road. For now I am enjoying the challenge of making the small space work. My workspace is filled with thrift store finds, found objects and collections including the organizer display below for $0.25. I believe it is intended for bathroom hand towels but it works great for organizing my ribbon and jewelry wire. All of my furniture was second hand including my desk, chair and old rickety storage cabinet my mom gave me years ago. I also have collections of Eiffel towers given to me from my family, old keys, vintage buttons and more.
 I have a very neutral, mix-matched pallet in my space right now and I am trying to brighten up with some color. Eventually when I have my own room I would like to paint the walls aqua blue with black and antique white as neutrals, touches of chartreuse green and pops of red. You can see swatches of the new colors on my bulletin board below. I love this color pallet because it’s very modern and feminine at the same time. It will also look great with the mix of vintage pieces I have and the modern black frames of our family portrait wall. So with all that in mind I’ve been collecting a few new things here and there including new fabric to update my bulletin board, a WWII reproduction print ‘Keep Calm and Carry On’ from sfgirlbybay on Etsy, and some new storage pieces.
 The other half of our shared office is taken up by an Ikea corner desk and three large shelves displaying all our beautiful books. My boyfriend is a writer and I have a fond love for interior design, architecture, travel and feng shui books. I also have a hundred magazines from Dwell, Vogue, Home & Garden, Domino, etc. that I can’t bear to throw out. In addition to displaying our books the shelves give me a means to show off my collection of found objects and treasured gifts.
 As I make progress I will post photos of my new space. For now you can see more pictures and read more details about my workroom and treasures at Flickr.
 1 - Anna Maria Horner, Flickr
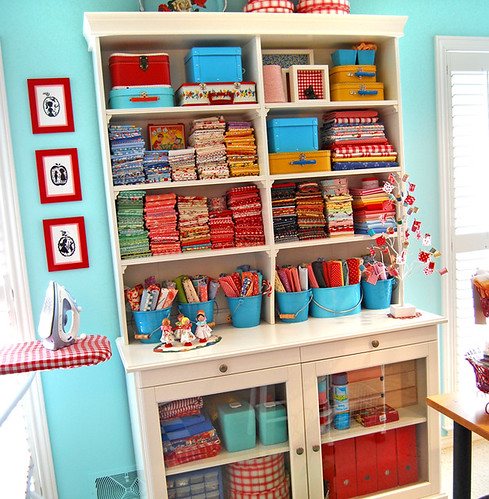
 I really like this space because it’s soft and feminine but still very colorful. I enjoy the pops of black and white on the bookshelf and all the vintage finds like the tins and collection of wooden spools. Her logo is “Vintage inspired design for your modern life” and I think her workspace reflects those words exactly. Check out more of this space at Bari J.- A Journal of Creative Inspiration.
 As Martha Stewart would say, “It’s a good thing”. Vintage tins and trays are a very good thing for office storage, or any kind of storage for that matter. They are colorful, fun and easy to find at any yard sale, thrift store or second hand shop. You can store just about anything in a tin container and tin trays can be hung on the wall as decoration or used as a message board with magnets. I have a couple newer Swedish cookie tins, English tea tins and some old trays that I use in my office. I love the bright colors and details.


Thrifty Tip: Do your research. If you are looking for something specific like vintage English or Swedish tins get online and do your research ahead of time so you know what to expect for price. Also, know what the signatures and symbols are for originals verses replicas. For example, Daher English tea and biscuit tins are stamped on the bottom with the company name and ‘made in England’. That way if you come across a great vintage tin at a yard sale for cheap you’ll know it’s a steal!
When I first saw this space I wasn't sure if I liked it but now I really do. The simplicity of the white furniture and bold colors used very strategically make the space appear bigger than it is. This room is from Greggory Han of Silver Lake, CA. You can see before pictures and get the whole scoop at Unplugged.
No matter how big or small your space there are 6 essential items I've determined are necessary to make a creative workspace....
6 BASICS TO A CREATIVE WORKSPACE:
1. A functional desk: What type of desk you get is always determined first, by how much room you have in your space and second, what type of activities you will be doing (i.e. computer, crafts, sewing). Third, find a desk that fits who you are because it will be the center of your creative space.
2. A comfy chair: Always get a comfortable chair! Most likely you’ll be sitting in it for hours and you don’t want a sore back from scrapbooking. Also, if you have the space for guest seating take it as an opportunity to get creative with colorful upholstery or pillows. It will make your space feel more relaxed.
3. Appropriate task lighting: Chances are your ceiling light is not efficient lighting for crafting. Consider getting a desk light, table lamp or drop ceiling pendants. If you have different activities within your space you may need more than one type of lighting.
4. A place to display ideas: Every creative workspace must have a place to display ideas, notes or photos for inspiration. Bulletin boards are easy to personalize with a little paint, fabric, ribbon and tacks.
5. Organized supplies: Whether its scrapbook paper, fabric, jewelry supplies or business receipts it all has to be organized. An organized space is a creative space! It’s hard to feel inspired when you’re overwhelmed with a mess and can’t find anything. You can use anything from rubbermaids to shelving; glass jars to vintage tins and lots, lots more.
6. Personal inspiration: Once you have everything else don’t forget to add a few family photos, vacation pictures, your favorite knick-knack, books or magazine clippings for inspiration. These are the things that motivate you to be creative in the first place.
I have been slowly updating my workspace in our office because it is a small space and I haven’t been overly inspired to work in there. However, because I work from home I really want to distinguish my working space from my living space and right now I just work everywhere and anywhere. In my searching for inspiration I found some great creative workspaces on Flickr I wanted to share with everyone. I will post one showcase a day for the rest of the week along with pictures of my workspace and other goodies.
I really love the colors in this first space. The mix of complimentary blues and reds are well thought out and balanced. It seems like a very fun space to work and sew. To see more pictures of this workspace click on the photo to be directed to the Flickr.
I loved it! It was a long Saturday and a little overwhelming but it always can be with these kind of events. Coming from a small town in Idaho we don’t get many big craft fairs and when I would visit a fair it was usually a bunch of crafty old women with country décor and baked goods. This was not country crafts! It was a very young, very modern group of artists and craft fans. I was impressed with the variety of products and shops that were there, and there were a lot of them. Many of my favorite sellers from Etsy were in attendance along with some amazing local artists. There was everything you would expect to find at an indie craft fair: screen print T’s and posters, unique ceramics, jewelry, letterpress cards, printed pillows and home décor, hand sewn bags, buttons, clothes and more. This year’s Renegade mascot was an owl and a theme reviled itself as you walked the isles of the Palmer Event Center. I wasn’t there to shop but I ended up taking a few things home from some of my favorite Etsy sellers in support. Stuff I picked up at the fair:
1- ‘You and me are awesome’ poster, unknown! I lost a few business cards and I’m terribly sorry I did because I really liked these guys and would like to give them credit.
2- Tree print, Laura Berger Art & Illustration, www.laurageorge.etsy.com
3- ‘It’s not that far, really’ 5x7 card, Rar Rar Press, www.rarrarpress.etsy.com
4 - Letterpress cards, Letterpress Delicacies, www.letterpressdelicacies.com
The main reason I attended the Renegade Craft Fair was to scope out how the professionals set up their booths and present their products. I’ve done a few craft fairs back home with my future mother-in-law but it was nothing compared to some of the beautiful setups I saw this weekend. A couple common themes were vintage display cases, luggage, furniture or crates to house products; and colorful banners and fabrics with shop names or Etsy store info. These are things I’m going to take into consideration over the next couple weeks as I prepare to set up my own craft table at our local Artisans Market on South Congress. Here are a few photos from my favorite shops and artists…
 Pictures starting left to right and down:
1- Mary Ink, www.maryink.etsy.com
2- Laura Berger Art & Illustration, www.laurageorge.etsy.com
3- *Letterpress Delicacies, www.letterpressdelicacies.com
4- Circa Ceramics, www.circaceramics.etsy.com
5&7- *A Wahl Designs, www.awahldesigns.blogspot.com
6- Smug Mug, www.weekendcreations.etsy.com
8- Clay Wood & Cotton, www.claywoodandcotton.com
* Austin Locals
If your anywhere near one of these major cities I would definitely check this craft fair out: Chicago, Los Angeles, San Francisco, Brooklyn. Its free and a great place to find unique handmade gifts, home decor, jewelry and clothes. You can find more information at www.renegadecraft.com.
You can see all of my pictures from the craft fair at My Flickr. Enjoy!
Wow, the last few days have just flown by! I apologize for neglecting the blog but I've been preoccupied with birthdays, craft fairs and helping a friend move. I promise that later today I will tell you all the details about the Renegade Craft Fair. Also this week, I wanted to share a few photos of my workspace and some of the fun things I picked up thrift store shopping for my own craft fair table.
For now here's me and my boyfriend enjoying a Hibachi birthday dinner at Fujiyama.

The little beauty on the left is my thrifty find of the week. I picked it up at Goodwill for $3 and when I find a a way to make an equally thrifty base I'm going to fill it with mini terracotta pots, terrarium plants, and moss.
Terrariums can be made from just about anything....even light bulbs! The image on the right is a terrarium made out of picture frames from Country Living. I thought it was a fun project for this week since we've been talking about spring and spring colors; and there's no better color to add to a room then some greenery!
You can find the step-by-step instructions for this project below...

Picture Frame Terrarium
Supplies & Tools:
* Picture frames: four 5" x 7", two 8" x 10", and two 11" x 14"
* Drill with a 3/32" bit
* Fine weight sandpaper
* Plywood or plexi glass scraps and a means to cut into triangles
* #6 x ½" wood screws
* Four 2" mending plates
* Two corner brackets
* Two 1” utility hinges
* Paint & brush
Step 1: Remove the backs and glass from eight frames (four 5" x 7", two 8" x 10", and two 11" x 14"). Lightly sand each frame's surface.
Note: You can find used picture frames at any thrift store, yard sale or second hand store for not a lot of money. Since you need specific sizes for this project you may have to shop around a little bit. Make sure they are solid wood with a simple narrow frame. Don’t worry if they match because you’re going to paint them later. Step 2: Align an 11" x 14" with an 8" x 10" frame as shown. Drill one hole near the top and one near the bottom, through the larger frame and halfway into the smaller; screw together. (The screws you use should correspond with your drill bit. We suggest a 3/32" bit and #6 x ½" wood screws.) Repeat with other 11" x 14" and 8" x 10" frames.
 Step 3: Arrange the two L's you've created as shown. Attach them to each other using the same method described in Step 2 to form the terrarium's base.
 Step 4: Place two 5" x 7" frames facedown. Align a 2" mending plate at each end of the frames, as shown. Drill pilot holes and secure with screws. Repeat with the two remaining frames.
 Step 5: Align the two sets of 5" x 7" frames as shown. Attach a corner bracket inside each end of the eave, using the method described in Step 4.
 Step 6: Line the resulting roof up with the base, as shown. Place two 1" utility hinges, spaced evenly apart, over the joint where the pieces meet. Drill holes and screw together.
 Step 7: Trace the inside of an eave on paper. Cut out, and trace the resulting triangle onto a piece of ½"-thick plywood. Repeat; then cut the wood.
Step 8: Fit the cut wood into each end of the roof. Attach by pre-drilling holes from the outside of the roof into the triangles and securing with screws. Step 9: Wearing gloves for safety, smooth wood filler over the terrarium's exterior, filling in the joints and covering the screw holes. Let dry for several hours; then lightly sand.
Step 10: Paint the piece white (or turquoise, or red, or any color you choose!). For a distressed finish, apply a dark furniture polish over the paint after it dries. Let sit for a few minutes; then buff off. Step 11: Replace the glass from the bottom up. Place hot glue in the corners of each frame, pop the pane in, and run glue around each frame's inside edge.
Place in the terrarium your favorite plants and enjoy! For a list of terrarium appropriate plants suitable for low, moderate or bright light visit The Garden Helper.


ReStyle ReUse ReDesign © 2008. Template by Dicas Blogger.