July 29, 2011

R&R Design now at Sanctuary!

It's a week for consignment! I'm excited to announce that R&R Design can now be found at Sanctuary. Like Atown this beautiful store carries lots of handmade goodies from some of our favorite artist including Baby Bolt, GemJunkie, Craft Chi, Lovely Lotus Designs, and more. Once again I am very excited to be taking my shop to the next level so please stop by and check out Sanctuary at 3663 Bee Caves Road here in Austin. You can also find Sanctuary on Facebook for blog updates, product photos and more...click HERE.


Link

July 28, 2011

R&R Design Vintage Game Collection

As you well know by now I love shopping at second hand stores, yard sales, thrift stores and anywhere there's a good bargain. I started finding and collecting fun old games from when I was kid and realized what fun jewelry the old game pieces would make. I now have a popular collection of jewelry made of vintage game pieces including monopoly, jacks, scrabble tile, dominoes, checkers, and poker chips. A select number of these pieces are available online at R&R Design and at my consignment locations including Atown and Sanctuary; all of them can be found in person at upcoming shows.

Because I don't want to be wasteful I'm also working on new ideas to do with all the game boards, cards and extra pieces I don't use to make jewelry. Some ideas include: sketch books and coasters made from the game boards and boxes, party packs with streamers and cupcake toppers, and wall art.


July 26, 2011

What You Need to Know About Consignment

Consignment is a good start or alternative to developing wholesale accounts with brick and mortar stores. For me it was the next logical step for my shop to find stores that would represent and market my merchandise outside of Etsy since I cannot afford to lease a space of my own. From my research, I've compiled a few helpful questions to ask yourself when considering consignment.

How to choose the best shop:

  1. Where is the shop located? Start local as out of town consignment can get tricky with shipping & delivery of goods, etc.
  2. Make sure you pick a store that has or has the potential to attract a huge number of customers. The more traffic the store attracts the better potential you have to make sales. If you are working with a newly opened store observe their surroundings. Are there other retail stores, coffee shops or restaurants that are attracting customers to the area?
  3. Does the shop carry what you are in the market for? Make sure your products will fit in well with the other merchandise including your price range.
  4. Visit the store. What is the atmosphere like? Are the products displayed well represented? Would you shop there?
  5. Check out the other artists. Do you know anyone that sells there? You can even go as far as contacting some of the artists to get a better feeling of the store's representation and its potential.
  6. How is the service in the store? Do you feel welcome and well represented?
  7. How well does the shop market/advertise? Make sure that they are actively working to attract customers to the store.
Things to ask/know about your contract:
  1. Who sets the product prices and what is your percentage or rate? A 60/40 split is pretty standard in consigning but each shop varies and can range from 30/70 to 50/50.
  2. Are there any additional fees such as administration fees, rental fees, credit card fees, holiday rate increases, etc.?
  3. How are you paid and how often?
  4. How is sales tax handled?
  5. How long is the term for your contract? A 30, 60 or 90 day contract is typical.
  6. How are your goods handled? Does their insurance cover possible breakage or theft of your goods?
  7. How and where will your items be displayed? How much space do you have? Are you required to provide any displays?
  8. Will the owner contact you to restock or is it your responsibility to periodically check?
  9. How/when will you receive back any unsold goods once your contract is up?
  10. How is your inventory managed at the store? Do you get an itemized list of inventory sold with your paychecks or at the end of your contract?
Resources:
(1) "The Handmade Marketplace: How to Sell Your Crafts Locally, Globally and Online", by Kari Chapin, Storey Publishing 2010
(2) "11 Tips When Selling Through Consignment", http://www.powerhomebiz.com/vol58/consignment.htm
(3) "Everything You Wanted to Know About Consignment Shops but Were Afraid to Ask", http://www.handmadenews.org/article/index.php?id=1034
(4) "How to Consign", http://howtoconsign.com/index.html

July 25, 2011

R&R Design Now at Atown

I am very excited to announce my first consignment contract! You can now shop R&R Design at Austin's newest lifestyle store, Atown on Burnet road. This adorable new shop carries Texas themed and local handmade apparel, jewelry, home decor, accessories, gifts, furniture and more. You can find some of my favorite products including bottle cap charm necklaces, wine charms, TX license plate ornaments, screen prints, upcycled owls and garden marker spoons. More new and exciting products to come soon!

I am so happy to be taking my shop to the next level with a represented storefront so please stop by and check out R&R Design at Atown on 5502 Burnet Rd. (at the corner of Burnet & Shoalmont Dr.). You can also find other local handmade artists such as GemJunkie, Merritt Gade Fine Handmades, Nepenthe's Bathtime, Amelia Beth, Smash Tag, and more.

July 22, 2011

Its a Pooh Bear Room!

We had a lot of fun putting together our baby room over the last couple months. Now that baby Gabe is here we are enjoying it even more! Before we knew what the sex was we decided we were going to stay neutral with our color pallet either way. I'm not a huge fan of the bright blue or pink traditional color pallets so we picked out this earthy green paint and went from there. I knew I wanted to theme the room with forest creatures and Pooh bear so our first big purchase was our classic Pooh bed set on clearance (always a thrifty shopper!). Our furniture came from Ikea, the little bear chair from a thrift store for $5, some fun Etsy posters and the rest is handmade.

The poster below came from a craft fair two years ago and the sock monkeys a friend made for me and baby. I hope to have an entire army of sock monkeys by the time he's old enough to play with them. I adore them. :) The robot painting on the right was given to us by another friend. It isn't Pooh bear but it matches our color pallet and is a nice contrast.

One of the first projects I started for the baby room was these Pooh bear wall hangings that matched the new bed set. I cut the characters out of felt and hand stitched the details along with the quote, "You are braver than you believe, stronger than you seem, and smarter than you think" by Christopher Robin. I'm pretty happy with how they turned out.

Its not handmade but I love this classic Pooh cookie jar that a family member gave us. It fits in the room perfectly! Also, you can't forget about my fabric covered coffee cans I made for storage and lighting. They were so fun and easy to make. Check out HERE for a DIY tutorial.

A few of my favorite things in the room are displayed on this shelf above the changing table. They include my vintage Pooh bear that I had when I was little, an alphabet poster with woodland creatures by Green Nest, another adorable tree print I picked up from Laura George, and a collection of owls including a candle by Pommes Frites.

Hope you enjoyed taking a peak at our Pooh bear room. Happy Friday!

LAST CHANCE!!

Today is the last day to apply for the Austin Craft Riot Holiday Show on November 12-13th. Don't miss out on this great opportunity! If this is your first major craft show don't worry, the ACR team is dedicated and working hard to make your experience a fun and memorable one. For more information or to apply click HERE!!


July 21, 2011

The Best of Baby DIY Projects

I love to sew and I strive to make my own handmade projects outside of my shop work when I find the time. While I was pregnant I collected all these amazing baby projects from other talented bloggers who have been so gracious to share their work. I hope to make a few more of these myself for baby Gabe and other friends baby showers. Please enjoy and make sure to leave a comment on the original blog if you love a project a much as I do.


July 20, 2011

A Handmade Baby Shower


Thanks to all my amazing family and friends for everything you do!

July 19, 2011

Baby Shower/Party DIY Project

Here are two adorable, easy decorations you can make for any party. I made these for our baby shower which is why they are themed with woodland creatures. You can use any kind of fun art, images or text for these projects. I got these pre-made digital images from a seller on Etsy.

PROJECT I: MINI GLASS CLIPS

Because we wanted to use real glasses for the party I wanted to make some kind of glass/wine charm that everyone could use to keep track of who's glass is who's. We don't have enough long stem glasses to use my standard wine charms so I thought it would be fun to make something that could clip or sit on the edge of any glass. These are really simple to make...

What you need:

1" round images printed on cardstock (# depends on how many you want to make. I made 20)

mini clothes pins from a craft store

1" craft punch or scissors

packaging tape

hot glue gun

Once you have your images printed the first thing you want to do is use the packaging tape to seal both sides of the paper where you are going to punch/cut out your images. Next, punch/cut out your images into 1" circles. After you have all your images ready simply hot glue them onto the tips of the mini clothes pins and voila! You can stack them neatly in a jar for storage as I've done below and when you want to use them just clip them along the edge of the jar for people to grab.


PROJECT II:
MINI GARLAND

To match my bunting and other decorations I made this cute mini garland out of the same images I used on the glass clips. Mine says "welcome" but you could make any words, phrases or images to go along with your party theme.

What you need:

1.5" images printed on cardstock (# depending on how long you want to make it. Mine is 15 circles, roughly 3.5ft long)

coordinating paper for backing (I used thin paperboard from the recycling)

1.5" and 1.75" craft punches or scissors

string

glue

Punch/cut out your 1.5" images and enough 1.75" backs to match. Tie a loop in the end of your string and start your first circle a few inches from that loop. Simply glue the string between your backing and images spacing them approximately 1-1.5" apart as you go. I went back and glued additional 1.5" images on the back of my circles to make it double sided. For an even cleaner look you could double the backing and glue the string between the backing and place your images cleanly on the fronts (this just makes the bump of the string less apparent). When you've finished gluing all your circles, cut your string and create another loop a few inches from the last circle and your done!

I had fun making both of these projects and am happy to share them with you. If you decide to make your own in the future don't forget to send a picture!

July 18, 2011

I'm Back...Again!

We finally welcomed our baby boy Gabriel Thomas into the world last week! We are all happy, healthy and glad to be settling back into our routine at home. I would apologize as usual for my absence on the blog but I'm hoping you'll understand. :) In honor of our little man, expect that this weeks posts will consist of everything baby; including a sneak peak at our baby room, baby diy projects, a photo montage of our adorable baby shower and more. Enjoy your week!

July 8, 2011

Shop Feature: Berkley Illustration


So I've been dying to share these beautiful illustrations from Berkley Illustration on Etsy. They happened to be a fellow vendor at the Renegade Craft Fair this year but my love for their corky animal designs started when I first saw them there last year. I have to admit I don't actually own one of their prints yet but mainly because I can't make up my mind they are all so fun!

Their specialty is their animal portraits; they have every animal imaginable from the ones you see below to a jackrabbit, a panda, and even a T-Rex. They have expanded their shop to include other categories and designs including The Mighty Ocean (my favorite print below), Creatures and Friends, Kenny and Superheros, and even some limited edition and original prints.

I highly suggest checking out their shop on Etsy and even better if your in the San Francisco or Los Angeles area catch them at one of the Renegade Craft Shows coming up this month.


Become a fan on Facebook!


Click HERE and become a fan of R&R Design on Facebook for daily updates on new products, market hours, events, shop info and more!

July 7, 2011

Thrify Thursday: Vintage Luggage

I LOVE vintage luggage! I have at least eight pieces in my current collection and I always have my eye open for more. I use them in my shop for displays, I use them to store quilts, supplies, and more all over my home. This fun set came to me as a gift all the way from Idaho and like most thrifty finds they were a little dirty and in need of some loving care.


I usually try and keep the integrity of the original piece in tack but in the case of the small travel case I thought it necessary to replace the lining. I would normally replace it with a vintage fabric in a fun pattern but I decided I'd try a little mod podge with old maps. After I removed the old lining and cleaned up the piece I simply tore out familiar sections from different maps of the northwest (seemed suitable since the luggage came from my home in Idaho) and layered them with glue along the bottom and sides of the interior. After everything dried I went back and put a layer of mod podge over all the maps for a nice finish.


I can't be more pleased with how it turned out! I enjoyed the look of the old maps so much that I took one of the larger pieces of luggage that had the silk coming apart in the lid and replaced it with a map collage as well. I now use the matching set as displays for my products at markets and shows.


Thrifty Tip: I have never paid more than $12 for a piece of vintage luggage including my HUGE leather Samsonite that's in great condition. You can find lots of beautiful pieces in antique stores on a regular basis but I recommend sticking to second hand stores and flea markets. It may take a little longer to find what your looking for but its way more fun and gratifying when you find that perfect piece for under $20.

July 6, 2011

Renegade Craft Fair

On May 21-22nd the Palmer Event Center here in Austin hosted their 2nd annual Renegade Craft Fair. I was one of the lucky 200+ handmade vendors that was selected to participate. I shared a booth with my dear friend Kelly from GemJunkie and enjoyed the company of my fellow Austin Craft Riot teammates including Craft Chi, Baby Bolt, Pommes Frites, Robo Roku, Nepenthes Bathtime and more.

This fall the Renegade circuit is coming back to Austin November 26-27th for their first ever holiday show. Applications open in August and I am hoping again to participate in this amazing event. For more information or to apply check out www.renegadecraft.com. For now enjoy some fun pictures of our booth from Renegade Austin 2011!


July 5, 2011

Baby Room DIY project...

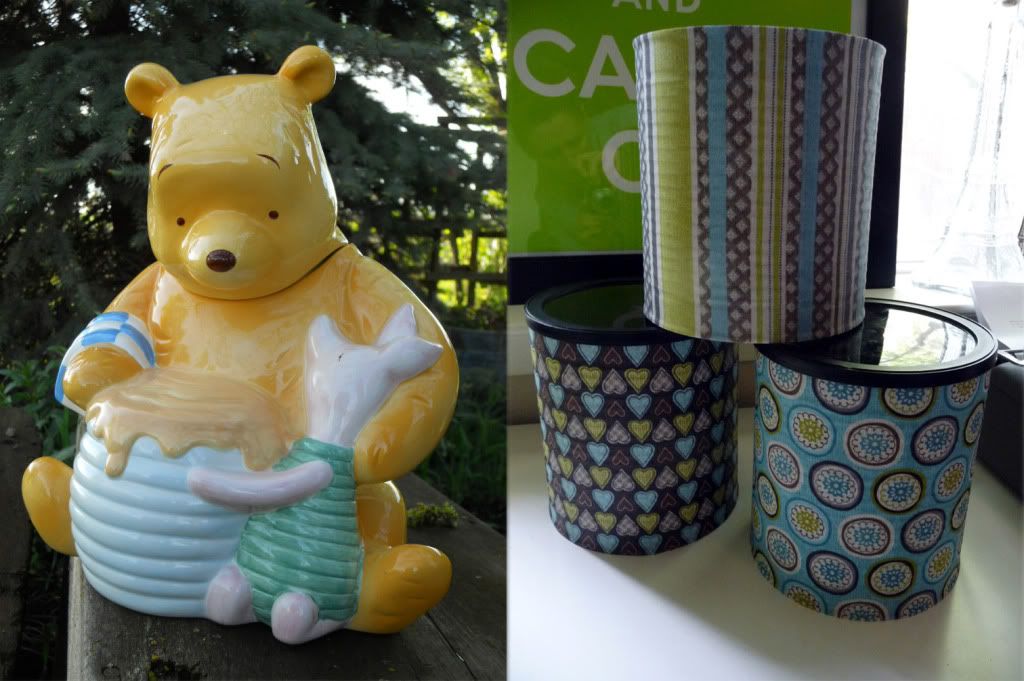
So a friend gave me these large metal coffee cans and I've been wanting to make some cute storage out of them for my office. With baby coming along I took the opportunity to finally get them done. I think they'll be perfect for all those little necessities like thermometers, lotions, aspirators, etc. It was really easy so I thought I'd share it with everyone.

All you need is a large coffee can, preferably with a lid in this case, a scrap of fabric, glue (Mod Podge), paint brush and scissors.

Cut the fabric to approximate size and use the paint brush to place glue on the can. I recommend starting with a couple inches of glue, center the fabric and work your way around each side until you reach the seam. Once you've got the fabric secure to the can use the paint brush to put an extra layer of Mod Podge on the outside of the fabric to help protect it and adhere it to the can. Its okay to leave rough edges hanging off each side as shown below because its easier to cut them off when dry. Once you have the fabric coated prop it up on something and let it dry.

Once your fabric is dry (approximately 1-2 hours depending on glue and temp) you can use your scissors to cut the excess fabric off the ends and TA DA...your done! Well almost. I usually take a little glue on my finger around the edges once I've cut to help reinforce the fabric along the edge. If you have more than one can you can use coordinating fabrics in different patterns or colors to help distinguish which items are in which can.

My third can didn't have a lid so I used a can opener to cut open the bottom and make a lamp shade. I simply drilled four holes at equal distance along the ridge and added wire to allow it to hang from the ceiling. Then I followed the same steps above.

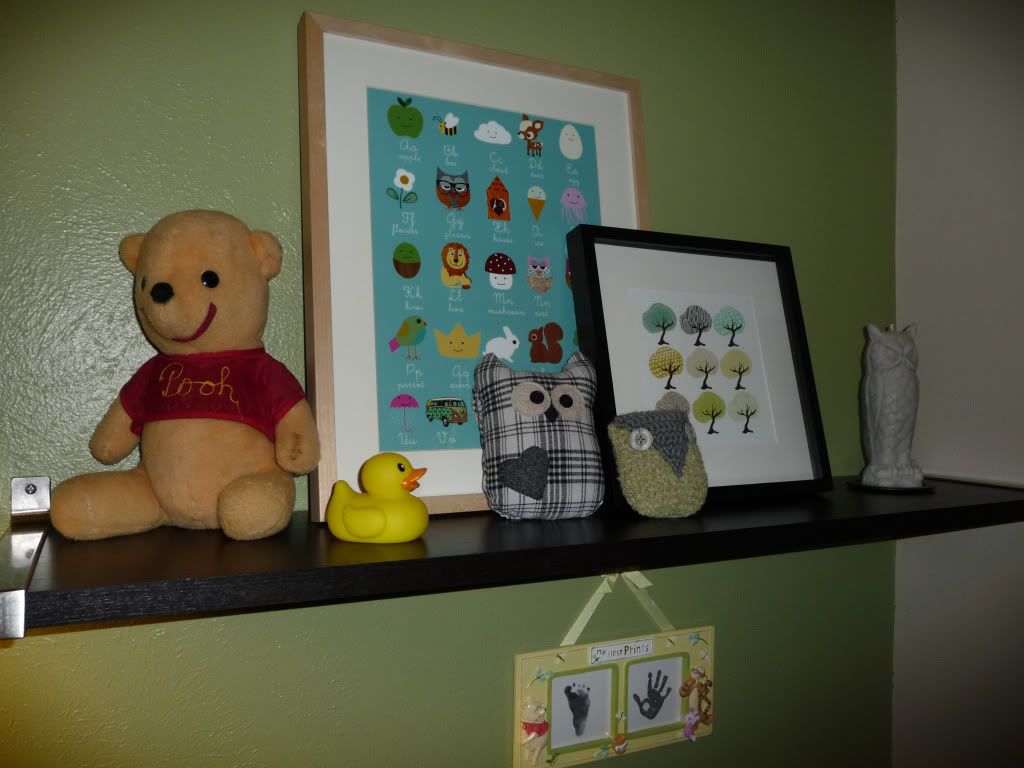
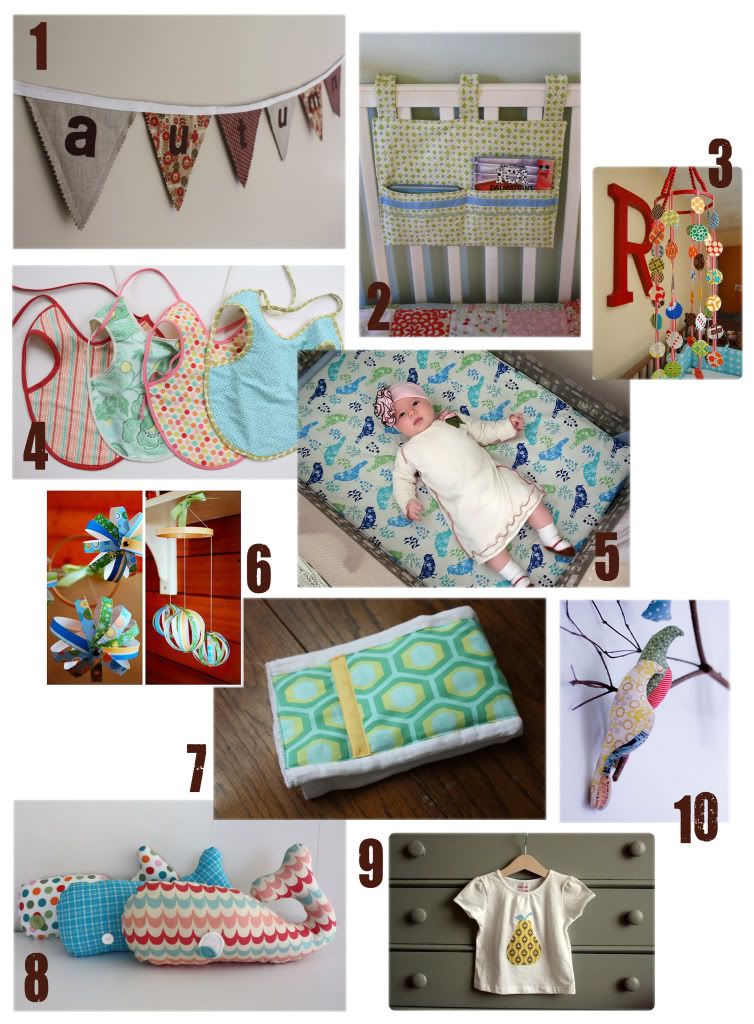
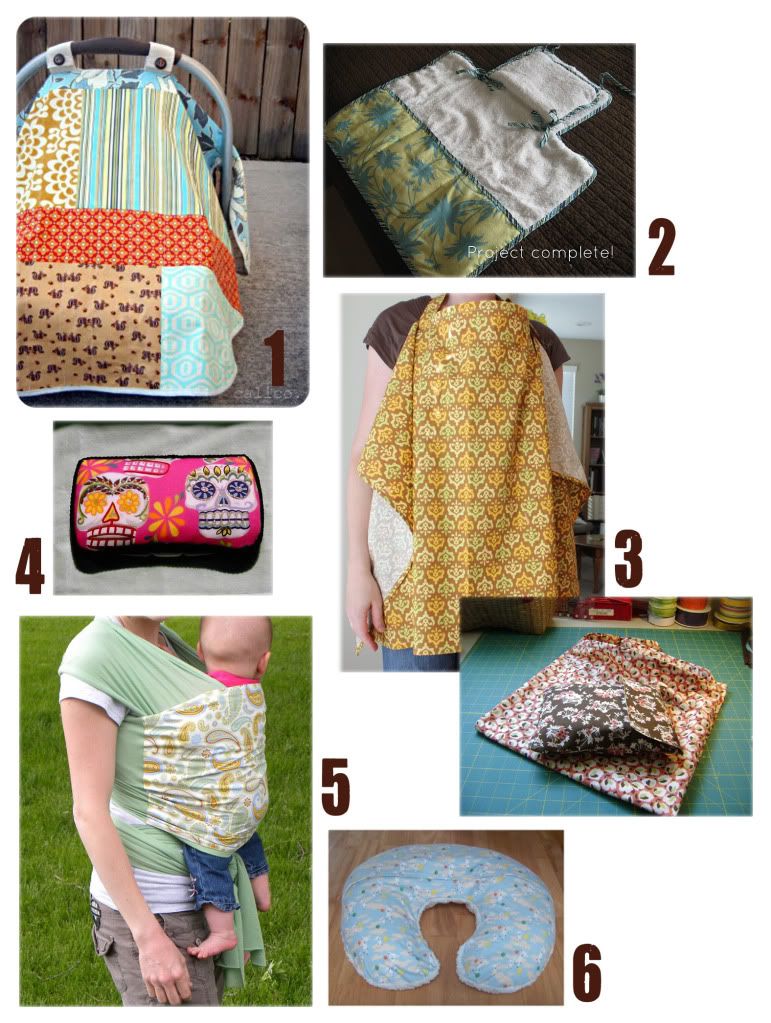
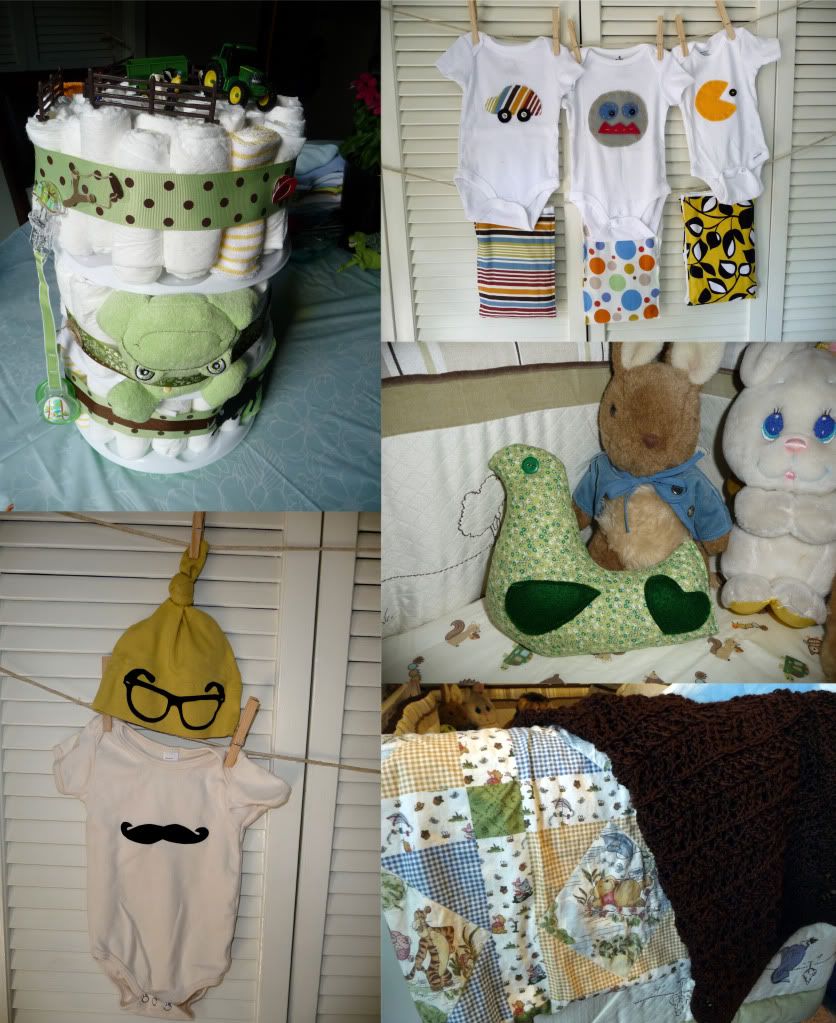
Whats your favorite baby room DYI project?
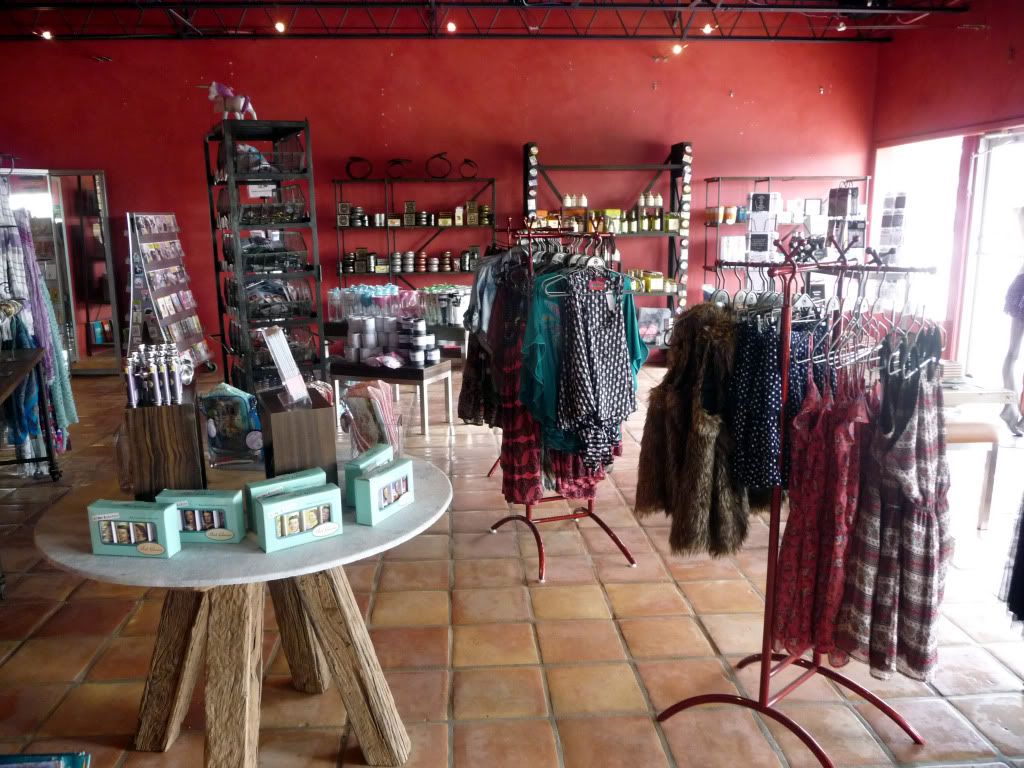
July 4, 2011

Happy 4th of July!

Please enjoy these beautiful photos on this beautiful day!

Happy Fourth of July! by Rachael & Jess

Spirit of Independence by Jim Merk

Fourth of July Cake by Krissy's Creations

Lookin' Forward by Kat Klein

July 1, 2011

I'm Back! A Little Update on Life...

Well a lot has happened since I stopped writing last August. On top of trying to run a full-time business I started a part-time job at a dog boarding facility in Georgetown, TX. It was a fun experience as I love working with animals of any shape and size. My market business on South Congress picked up drastically after partnering up with Kelly from GemJunkie and in November we found out I was pregnant! After my first big craft show, Austin Craft Riot, the next few months just flew by. I was lucky enough to spend time at home in Idaho where I spread all the good news to my family and friends over Christmas.

After a short break in January I started selling again at the Gibson Street Market on South Congress just in time to get ready for SXSW. After that it was crunch time making lots of new product for my biggest show ever...Renegade Craft Fair, an international craft fair circuit with over 200 handmade vendors. It was an amazing experience. Since Renegade I have left my part-time job at the dog boarding facility and am back to focusing full attention on my shop and getting ready to be a full-time mom. I've had fun putting the finishing touches on the baby room, relaxing in the heat of TX, and making brand new products for my shop (check them out HERE!)

Some of my current obsessions that you can look forward to seeing more of on the blog are woodland creatures great and small; babies and everything cute that comes with them; screen printing (my newest endeavor); anything vintage including bicycles, eye glasses, keys, umbrellas, books, typewriters, birdcages and I've even jumped on board the mustache craze! I look forward to bring you lots of goodies, fun DIY projects, beautiful photos and more. Have a great summer!

ReStyle ReUse ReDesign © 2008. Template by Dicas Blogger.

TOPO