Showing posts with label Craft Projects. Show all posts

September 27, 2011

Craft Project Complete!

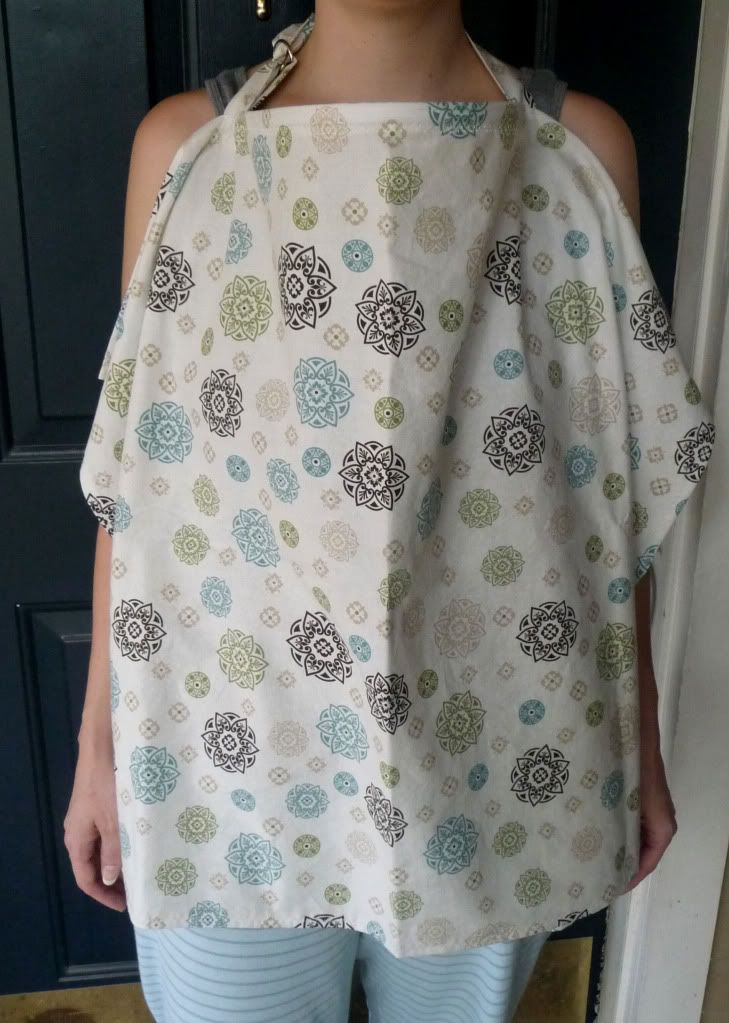
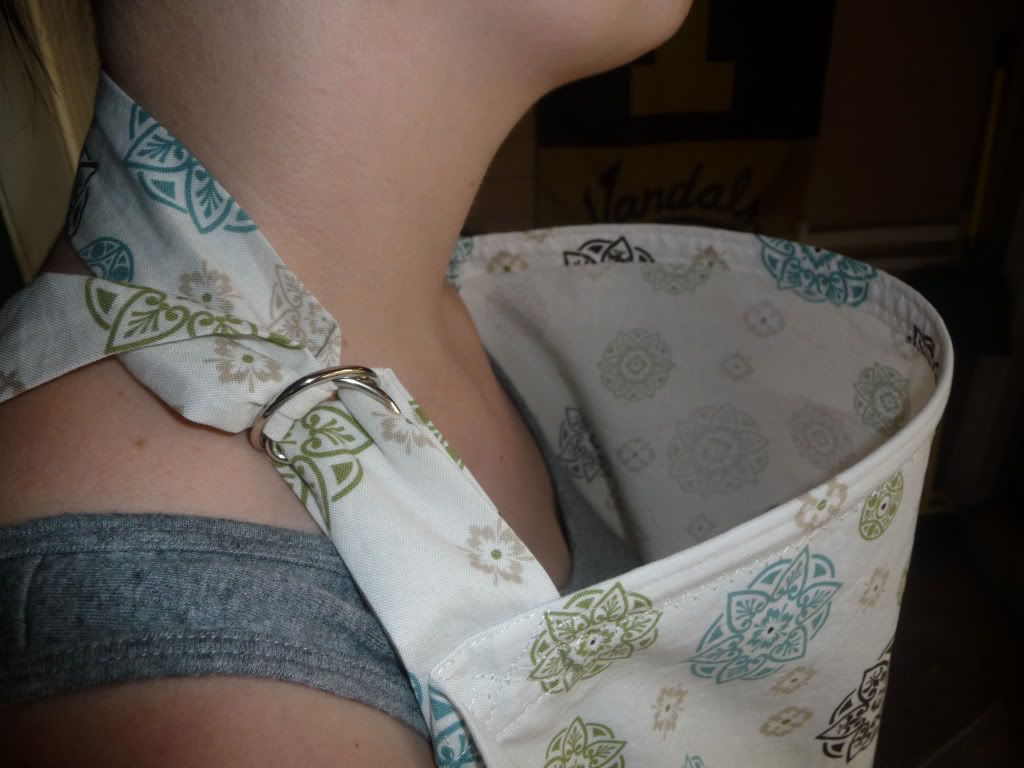
So I've been wanting to make this for months and I finally got around to it this weekend. If you remember back in June I had a list of my favorite baby DIY projects and this breast feeding cover was one of them. Well here is my finished version and just in time for fall shows and grandma's visit in October!


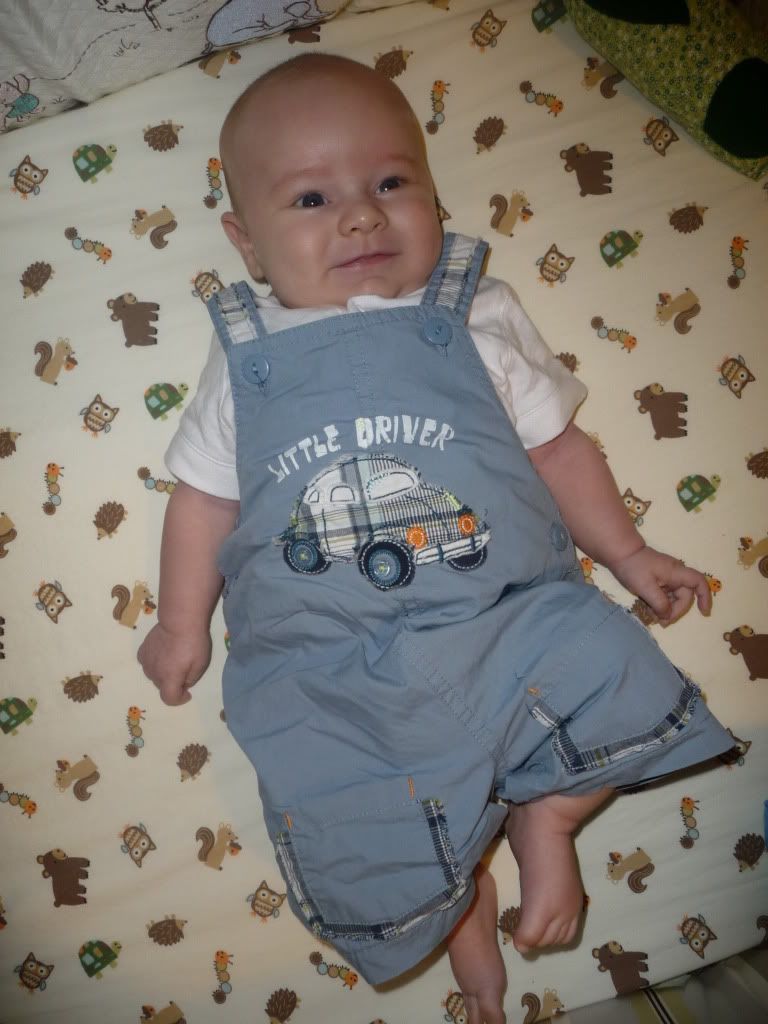
While I'm at it...Here is a pic of my beautiful baby Gabe who is now two and a half months old.  He is all giggles and smiles lately especially around the camera. He has started cooing and is desperately trying to crawl or stand on my lap any chance he gets.


PS. As you can imagine I've been busy, busy with baby and getting ready for fall shows along with my Austin Craft Riot duties. The blog tends to come last to all those things and I apologize because I enjoy sharing these projects with you. I've got lots of new stuff I'm working on that I'll try and post soon as well as a long overdue recap of my sisters visit to Austin. All for now.

September 14, 2011

DIY Project: Jewelry Frame Display

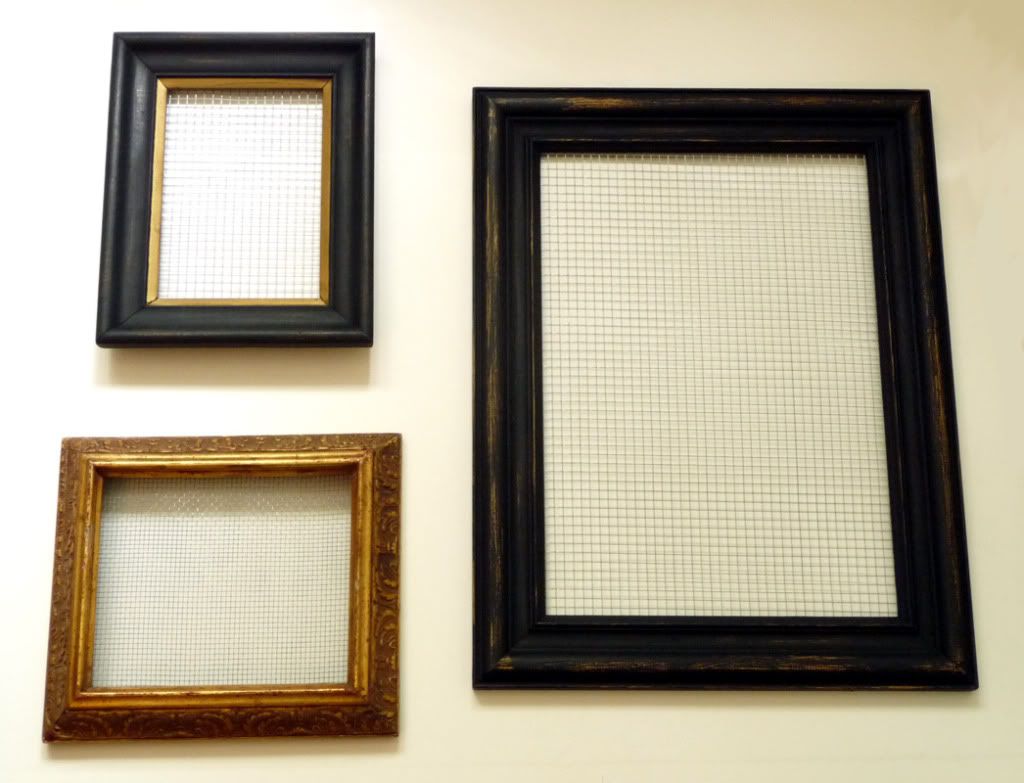
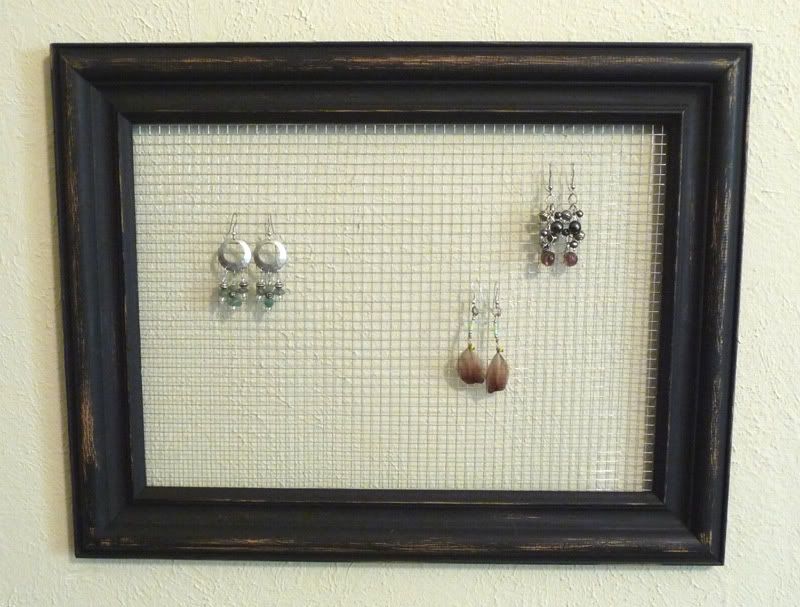
Here is another fun, easy project you can make for your shop or home. I made my first set of frames years ago to display all my fabulous earrings in the open so it was easy to pick and choose what to wear. You can make 1, 2, 3 or more frames in different sizes to suite your needs. I made this set of three frames for a friend's birthday. They are all second hand frames I picked up at different times and just painted them to coordinate.

What you need: 
Frames (as many as you want in different sizes)
Paint
Mesh screen (Not household screen but larger gage wire screen from the hardware store. It comes in various size openings like shown below.)
Wire cutters
Staple gun
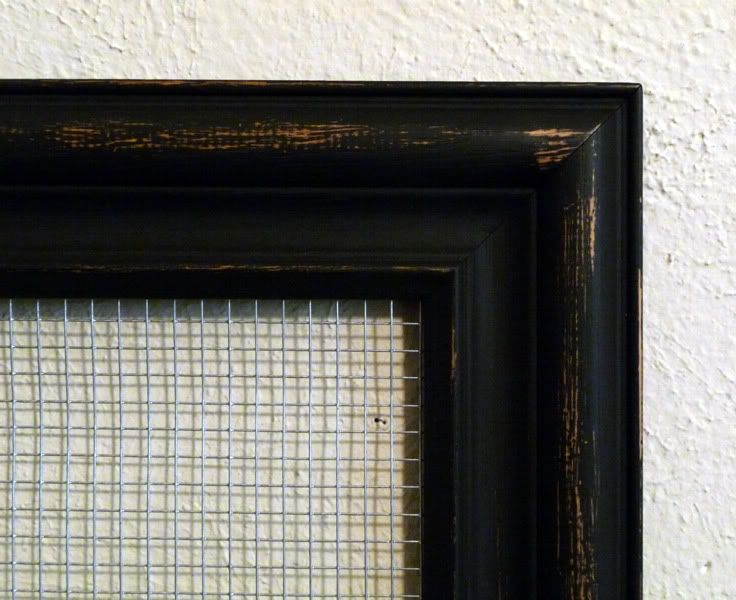
I bought frames without glass so I didn't have to waste it. If you find a frame you like that has glass you can dispose of it, give it away on Craigslist or think of something creative to do with it. I picked out three coordinating frames, two that had gold and one plain brown. I painted the large frame black and antiqued it then painted part of the small frame in black to match. I also recommend finding frames that are solid wood and have enough depth in the back to staple to.
The next step is to cut and adhere your wire mesh to your frame. I used the opening of the frame to mark my wire and because I had deep frames I added a 1/4-1/2 inch to all the sides so I could fold the edge over and staple into the side of the frames. This way the wire was contained and I didn't have it scratching my wall. If you don't have very deep frames you can add an inch to all sides and simply staple to the back of the frame. If you're worried about scratching your walls use strips of felt and a glue gun to cover the rough wire around the back of the frame. Just make sure that it is not visible from the front.

And voila, your done! You can now hang your frame(s) on the wall or I have also used mine with a stand at shows to display my jewelry for sale.  One last tip...depending on what type of wire mesh you get (stainless, galvanized, etc.) you may want to spray a couple layers of clear acrylic on it so you don't turn your silver jewelry. I only had problems with my sterling silver but some cheaper metals can turn as well if your not careful. Some hardware stores sell wire mesh that is coated with a thin layer of plastic coating. It is more expensive but a good option if you have lots of sterling silver you'd like to display.
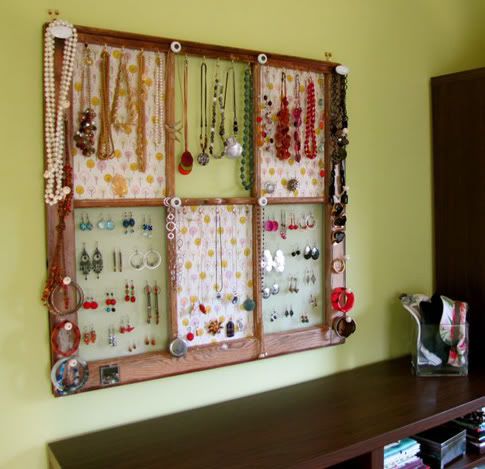
Here is a great tutorial from The Borrowed Abode on how to make a larger wall display with old windows like the one above. This is great for someone who has a shop or workspace with ample wall space or those at home who want to display more than just earrings. Enjoy!

August 22, 2011

DIY Project: Shutter Displays Part I

As promised here is another DIY project I just finished for my booth display. It was really easy to make and works great to display my vintage game jewelry. I inherited these two small shutters from some friends of mine and they have been sitting in the garage for two years. You can find shutters for cheap at second hand stores, yard sales, or Craigslist. You may also be lucky enough to find a good pair of shutters or shutter closet doors on the side of the road during a large item city wide dump or house renovation.

What you need:
  • 1-2 pairs of window shutters (Size depends on what you intend to display and how much. You can also use wood shutter closet doors and cut them down to make larger table top displays)
  • screw driver
  • hinges and screws (if your shutters don't already have them)
  • screw hooks or string
  • paint (as necessary to spruce up or change the color of your shutters)

To start you'll want to clean your shutters and paint them as needed. Mine came with a natural vintage white finish,which I liked, so I left them alone. However, if you aren't as lucky to find something you like as is you can create your own vintage finish or paint them bright, fun colors like the samples below. If your shutters didn't come with the original hardware you'll need to purchase the appropriate size hinges before completing the next step.

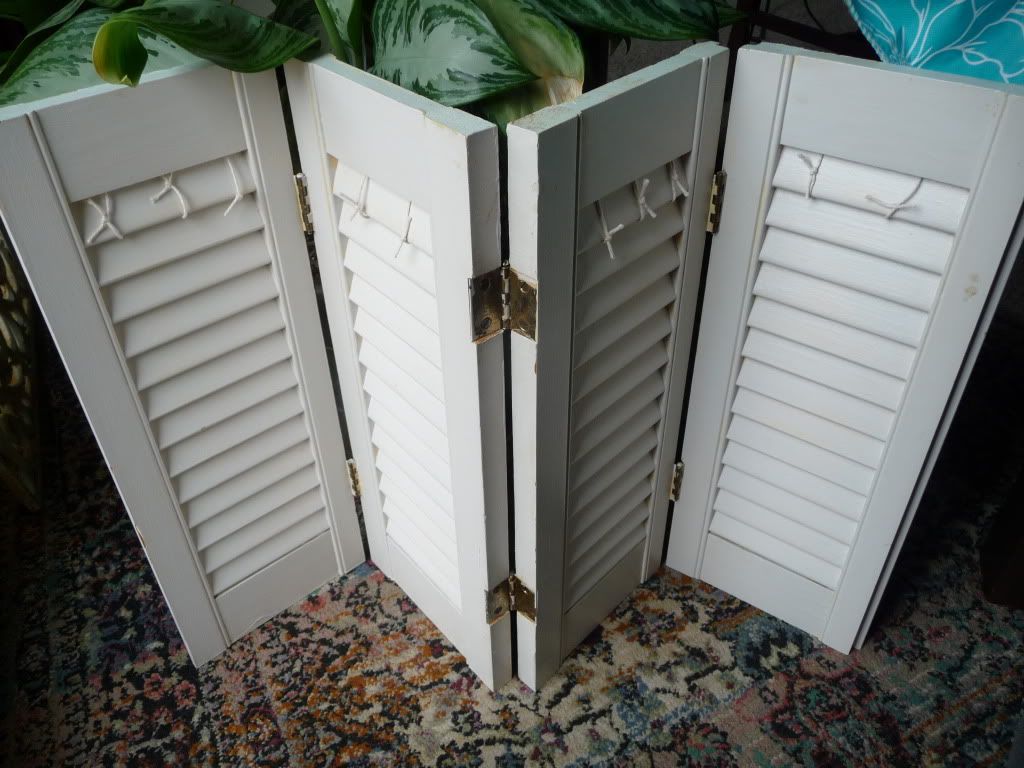
Depending on how many shutters you have (2, 3, 4, etc) you'll install the hinges to fold in the opposite direction. Example, I had two full shutters with two doors each already on hinges. I left those doors as is and put a third set of hinges on backwards to connect the two. That way it folded like an accordion as shown above. At this point you're pretty much done, all you need is a way to display your product.

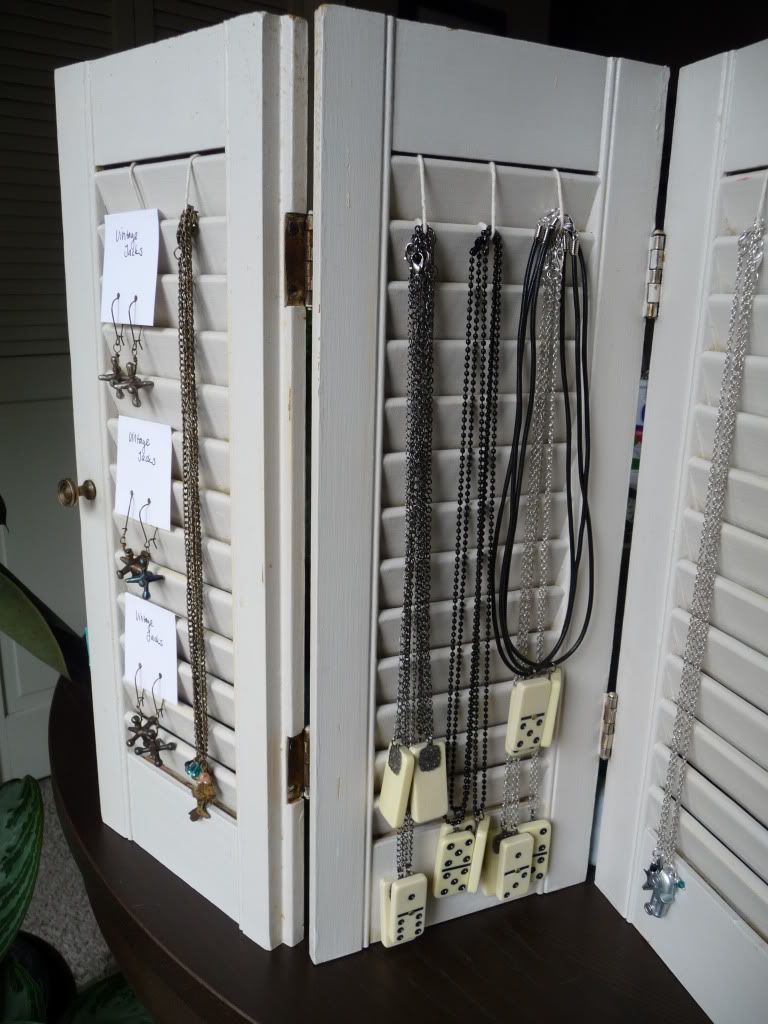
I decided because I didn't want to ruin my shutters in case I wanted to use them for something else down the road I'd use string to attach my jewelry temporarily. With the string the jewelry stays in place and I can simply fold the shutters up and go. I am sewing a special bag from scrap canvas that helps keep the jewelry steady during travel. The string also allows me to have a space above for signage and pricing.

There are many things you can do to display products on shutters:
  • Install hooks and/or drawer knobs instead of string along the top and you can hang jewelry, clutches, ornaments, etc.
  • Put a wood back on your shutters, paint it to match and display note cards and/or paper goods like sample A below.
  • Put your jewelry on business cards, fold them and hang them on the shutters as I've done with the jacks in the photo above.
  • Fold your product and slip it through the shutters like they've done with the wallets in sample D below. This would also work for note cards, linens, fabric products, etc.
  • Think big. Use full size closet shutter doors to create free standing displays for bigger products like they've done in sample C below or to enhance the feel of your space like they've done in sample B.
  • Get creative with embellishments or signage like they've done in sample A with chalkboard paint.

August 10, 2011

DIY Project: Tabletop Headband Display

This is the first of several DIY projects I hope to bring to you that center around displays for your tables/tent at craft shows. I have some ideas for new displays that will enhance some of my products for this fall and once again I'm excited to share them with you all. This project is also great for home if you have a collection of headbands like me that you would like to show off or don't know how to store properly.

What you need:
  • 1.5" or larger diameter wood dowel cut to desired length (mine is 24" but you can make a smaller version if you wish to use this at home on your dresser, etc.)
  • 6" or larger round wood base with a minimum 1/2" thickness (mine is a pre-cut wood base from a craft store)
  • quilt batting
  • fabric
  • glue gun
  • duck tape
  • drill and a 2" wood screw
  • sewing machine (optional)
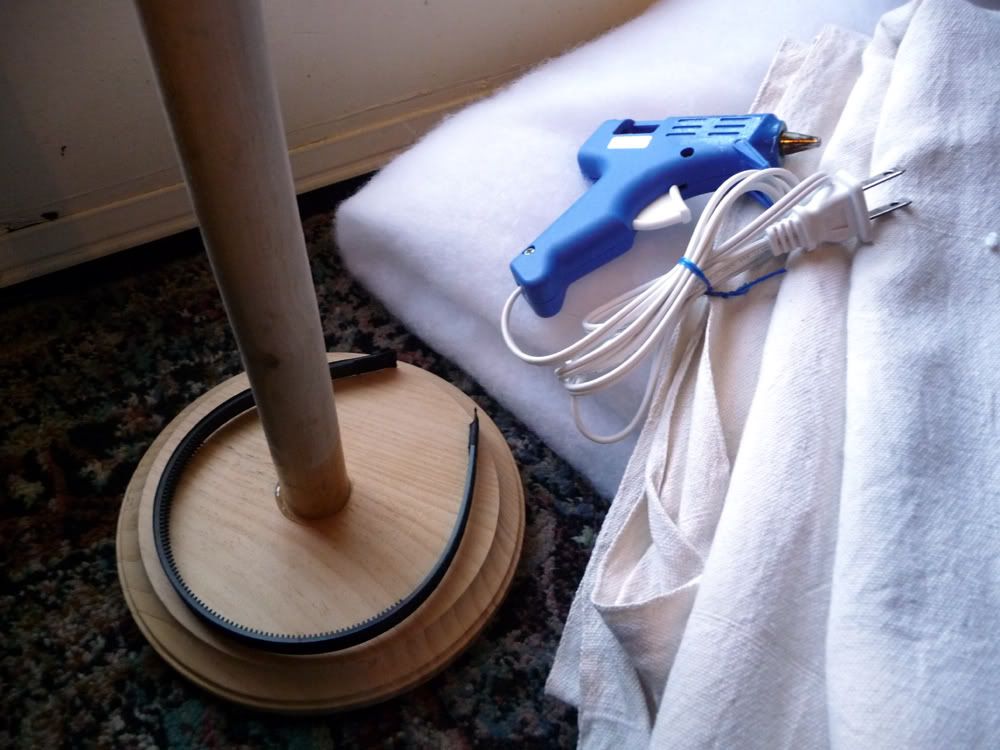
The first thing you want to do after you have cut your wood dowel to desired length is to attach it to the base. Find your center, pre-drill a hole through both pieces and attach with a 2" wood screw. I used some E6000 glue at the joint to help increase the strength.

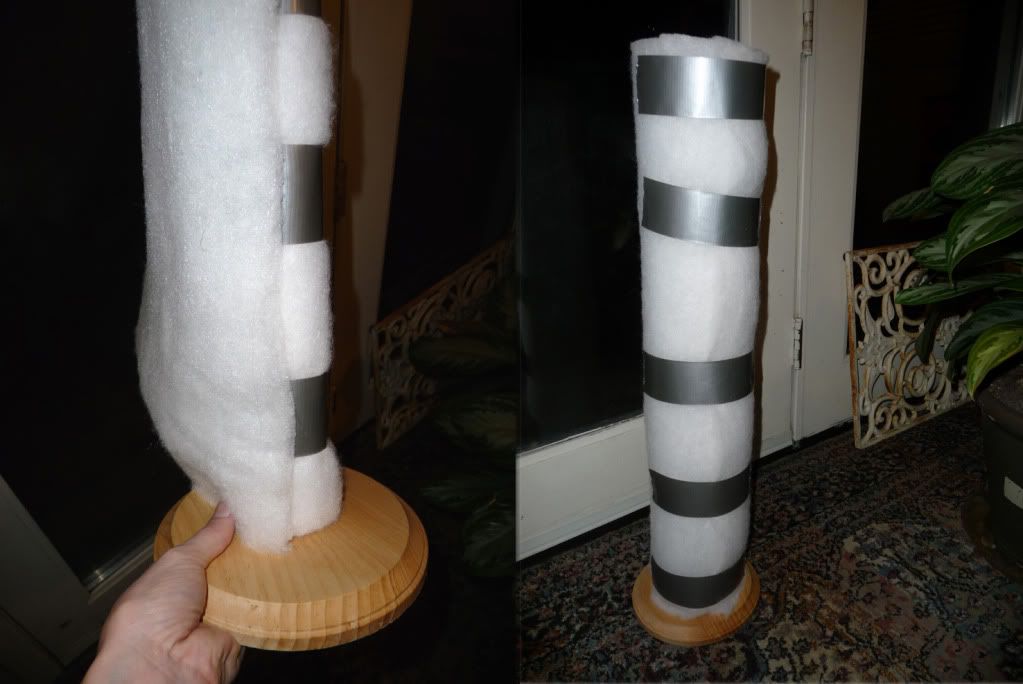
After you have your base attached the next step is to wrap the dowel with batting until you meet your desired diameter. I started with hot glue at the base of the dowel but had difficulty getting the batting to stick to itself as I added layers so I used duck tape as a base to add glue and start a new layer. I ended up with a finished diameter of approximately 4.5" as shown in the right photo below. This seemed to be an appropriate diameter to fit all my headbands snugly onto the vertical stand without falling off.

The last step is to cover your headband stand in fabric. I used a scrap of cream canvas I had laying around because I like the rough texture and it matches the color theme of my shop booth. You can use almost any type or color of fabric but I recommend using something simple that compliments or shows off your headband collection.

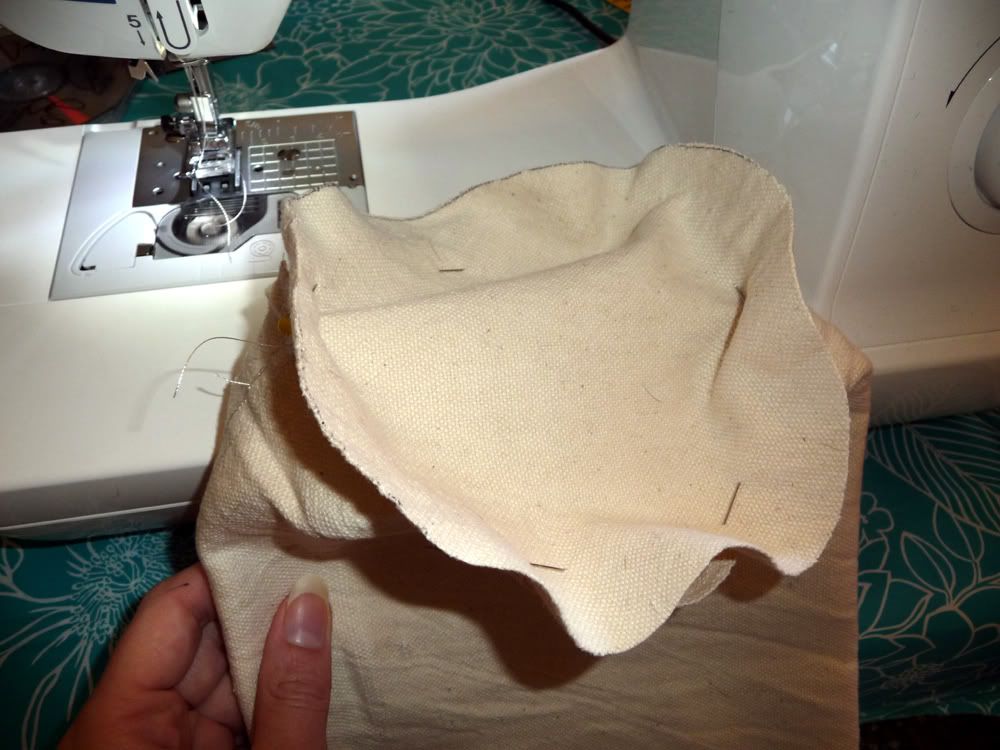
I measured my fabric to desired length (24" plus seem allowance) and used a sewing machine to make a 4.5" tube with a circular top as shown below. Remember to leave the bottom open so you can slide it onto the headband stand. For tips on how to sew a circular pattern click HERE for basic information on how to sew a bolster pillow. Its essentially the same idea. If you don't own a sewing machine you can cut your fabric to desired length just as I did but instead use a hot glue gun to adhere it to the batting/base.

Once your done sewing your fabric cover simply slip it onto the batting/base and use a few drops of hot glue to fold and secure the fabric along the wood base. I left an additional 1" seem of fabric along the base to do this so I could tuck the fabric neatly under the batting. The few drops of glue help secure the fabric so it doesn't shift during your travels.

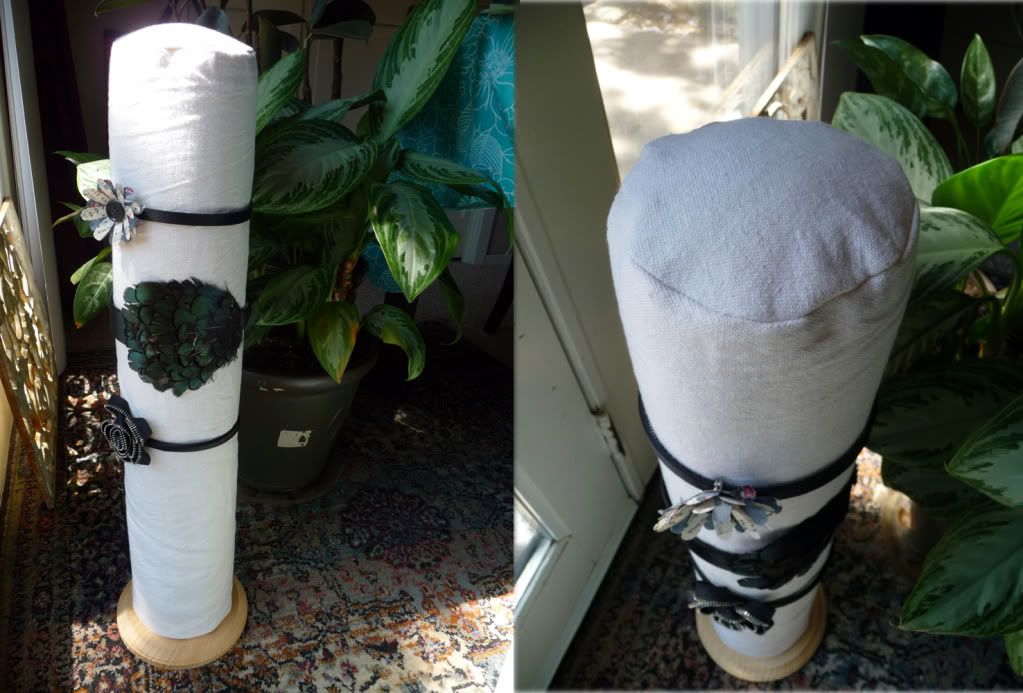
Add your headbands and your done! I hope you enjoyed this headband stand DIY project. I look forward to bringing you more projects centered around show/booth displays in the near future.


August 5, 2011

Guest Blog: ReClaimed Punk

I think part of what appeals to me about the art of reclamation and up-cycling is the idea that we are not only taking items and material that would otherwise end up in landfills, rivers and oceans, or even the very air we breathe, and making use of that stuff, but we're also being self-sufficient, taking back a piece of the drive and ingenuity and energy that allowed this nation of misfits to prosper yet has been monopolized by the corporate. And the perfect theme to capture this though is, naturally, Steampunk!

Steampunk idolizes the individual, and at its brass core is a union of old and new, of creative theatricality and cold, hard function. Also, it's super cool, yeah? Following are a few of my favorite Steampunk projects over at Instructables, and what I most like about them.

Steampunk Goggles: These are not the most interesting, or coolest looking Steampunk goggles to be found on the internet. No, what I like most about these goggles is the simplicity of the project and the creativity on display. Anyone can replicate this design, and it is easy to replace bits and pieces to come up with your own cool eye wear.

Steampunk Finger Sylus: I love everything about this project. It's simple, the components are easy to find, it has a unique look, and is surprisingly functional. Plus, I can see a dozen other cool projects to make out of this, too. You can see another example of this project here.

Steampunk Portable Harddrive Case: Now to go in the other direction - There is nothing simple about this project, but dang does the finished project look cool. I love the concept, but would like to see it done with reclaimed parts rather than craft store parts, but there is no arguing the success of the design.

Steampunk USB Flash Drive: A fun, flashy piece of steam punk (sorry, couldn't help myself). Beautiful to look at and much more durable than the original plastic case. You might get weird looks when you plug it into the office PC to transfer those work files, though. But isn't that part of the fun?

Steampunk Mr. Potato Head: Tired of all this function? Time for some pure fun? Then how about this modded Mr. Potato Head. He is way cooler than what I used to play with growing up. We used actual potatoes! But maybe that's just 'cause we're from Idaho. Anyway, this is a fantastic example of the sort of creative re-construction I've been showing you, and I hope it can inspire in you some fun, fresh ideas.

Thanks to the many fine folks who contribute to Instructables, and if you're interested in Steampunk, know that this is only the tiniest tip of an enormous clockwork submersible. If you have other favorite punk projects, or have created something yourself, tell us about it in the comments.
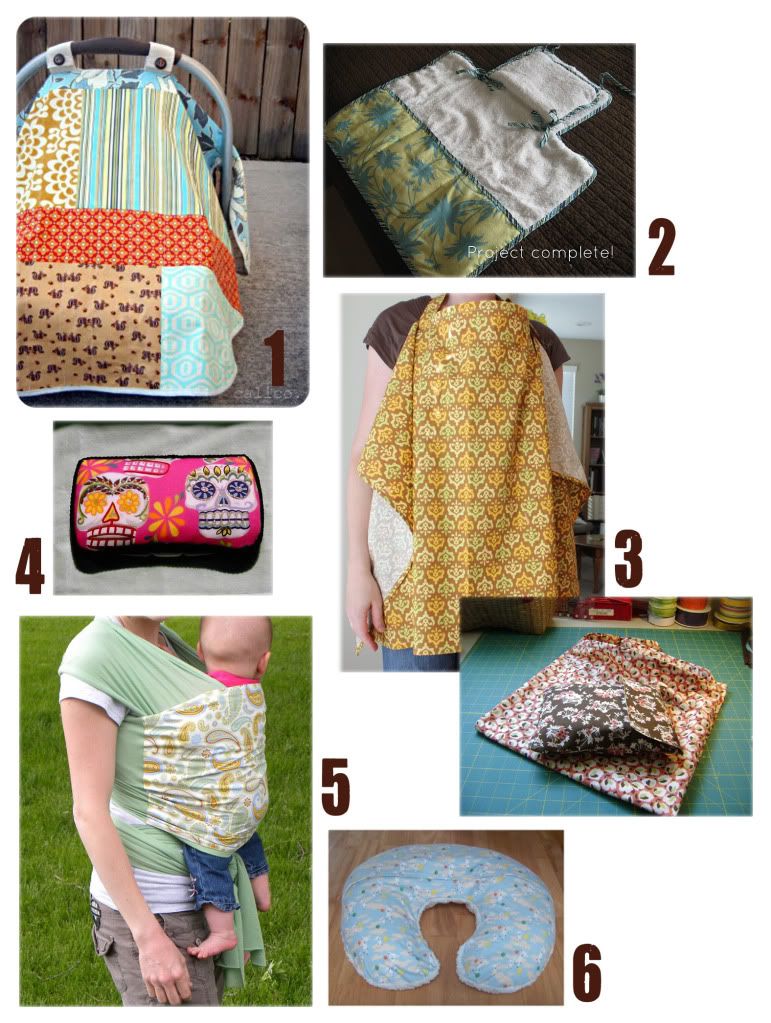
July 21, 2011

The Best of Baby DIY Projects

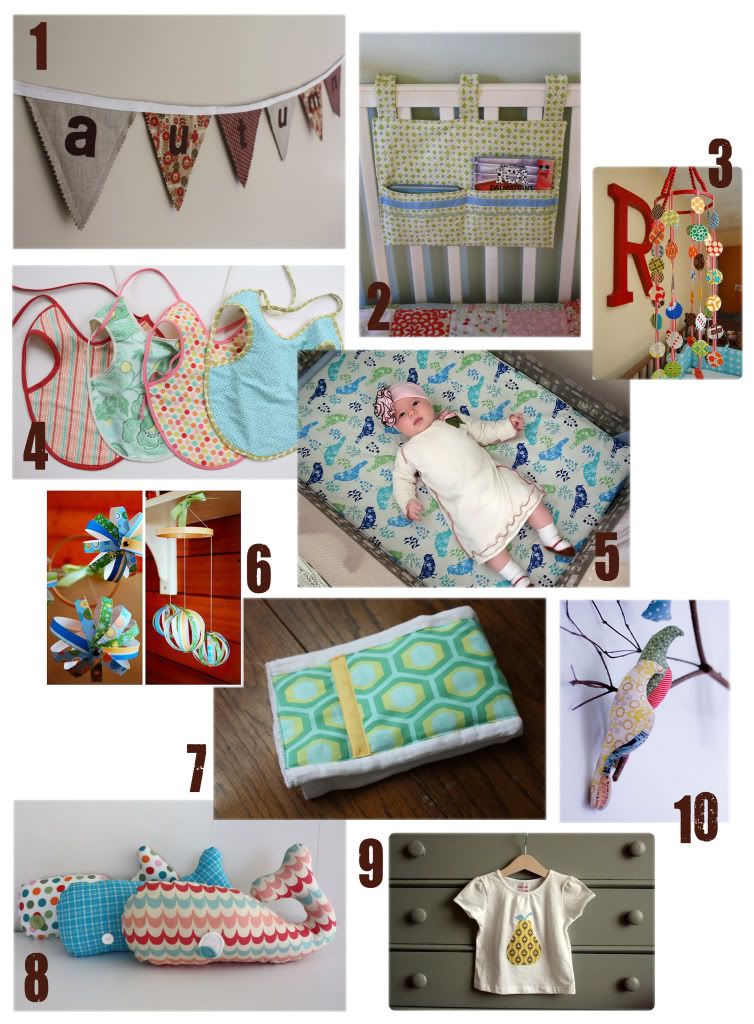
I love to sew and I strive to make my own handmade projects outside of my shop work when I find the time. While I was pregnant I collected all these amazing baby projects from other talented bloggers who have been so gracious to share their work. I hope to make a few more of these myself for baby Gabe and other friends baby showers. Please enjoy and make sure to leave a comment on the original blog if you love a project a much as I do.


July 19, 2011

Baby Shower/Party DIY Project

Here are two adorable, easy decorations you can make for any party. I made these for our baby shower which is why they are themed with woodland creatures. You can use any kind of fun art, images or text for these projects. I got these pre-made digital images from a seller on Etsy.

PROJECT I: MINI GLASS CLIPS

Because we wanted to use real glasses for the party I wanted to make some kind of glass/wine charm that everyone could use to keep track of who's glass is who's. We don't have enough long stem glasses to use my standard wine charms so I thought it would be fun to make something that could clip or sit on the edge of any glass. These are really simple to make...

What you need:

1" round images printed on cardstock (# depends on how many you want to make. I made 20)

mini clothes pins from a craft store

1" craft punch or scissors

packaging tape

hot glue gun

Once you have your images printed the first thing you want to do is use the packaging tape to seal both sides of the paper where you are going to punch/cut out your images. Next, punch/cut out your images into 1" circles. After you have all your images ready simply hot glue them onto the tips of the mini clothes pins and voila! You can stack them neatly in a jar for storage as I've done below and when you want to use them just clip them along the edge of the jar for people to grab.


PROJECT II:
MINI GARLAND

To match my bunting and other decorations I made this cute mini garland out of the same images I used on the glass clips. Mine says "welcome" but you could make any words, phrases or images to go along with your party theme.

What you need:

1.5" images printed on cardstock (# depending on how long you want to make it. Mine is 15 circles, roughly 3.5ft long)

coordinating paper for backing (I used thin paperboard from the recycling)

1.5" and 1.75" craft punches or scissors

string

glue

Punch/cut out your 1.5" images and enough 1.75" backs to match. Tie a loop in the end of your string and start your first circle a few inches from that loop. Simply glue the string between your backing and images spacing them approximately 1-1.5" apart as you go. I went back and glued additional 1.5" images on the back of my circles to make it double sided. For an even cleaner look you could double the backing and glue the string between the backing and place your images cleanly on the fronts (this just makes the bump of the string less apparent). When you've finished gluing all your circles, cut your string and create another loop a few inches from the last circle and your done!

I had fun making both of these projects and am happy to share them with you. If you decide to make your own in the future don't forget to send a picture!

July 5, 2011

Baby Room DIY project...

So a friend gave me these large metal coffee cans and I've been wanting to make some cute storage out of them for my office. With baby coming along I took the opportunity to finally get them done. I think they'll be perfect for all those little necessities like thermometers, lotions, aspirators, etc. It was really easy so I thought I'd share it with everyone.

All you need is a large coffee can, preferably with a lid in this case, a scrap of fabric, glue (Mod Podge), paint brush and scissors.

Cut the fabric to approximate size and use the paint brush to place glue on the can. I recommend starting with a couple inches of glue, center the fabric and work your way around each side until you reach the seam. Once you've got the fabric secure to the can use the paint brush to put an extra layer of Mod Podge on the outside of the fabric to help protect it and adhere it to the can. Its okay to leave rough edges hanging off each side as shown below because its easier to cut them off when dry. Once you have the fabric coated prop it up on something and let it dry.

Once your fabric is dry (approximately 1-2 hours depending on glue and temp) you can use your scissors to cut the excess fabric off the ends and TA DA...your done! Well almost. I usually take a little glue on my finger around the edges once I've cut to help reinforce the fabric along the edge. If you have more than one can you can use coordinating fabrics in different patterns or colors to help distinguish which items are in which can.

My third can didn't have a lid so I used a can opener to cut open the bottom and make a lamp shade. I simply drilled four holes at equal distance along the ridge and added wire to allow it to hang from the ceiling. Then I followed the same steps above.

Whats your favorite baby room DYI project?

July 20, 2010

ECO FRIENDLY DIY PROJECTS

Here are two of my favorite DIY projects reusing paper and fabric scraps. Enjoy!

This project comes from Ali Edward's blog about scrapbooking and memory keeping. Its a beautiful, modern way to reuse your old paper scraps! Click HERE for more information and instructions.

This project comes from Suzuko Koseki, author of Patchwork Style courtesy of Etsy.com. These potholders are fun, eclectic and can be made out of any old scraps. Click HERE to check out full instructions.

July 6, 2010

I'M BACK!

Well, after a very busy, very fun week with my boyfriend and his brother for his birthday I'm back! I've uploaded some new photos of our animals and life in Austin at Flickr. Unfortunately, we were rained out of First Thursday and the Saturday market this last weekend so I have no news on that end. I should be back at the Artisan Market on South Congress this weekend and we will be setting up early at 10:00am. I am really looking forward to it as I will hopefully be sharing a booth with Kristen from Pommes Frites. She works with reclaimed, re-purposed books and her work is amazing. She is a member of the Etsy Austin Street Team and you can visit her shop at pommesfrites.etsy.com or her blog...click HERE.

I am very excited because I have also joined the Etsy Austin Street Team and am hoping to participate in the Etsy Austin Craft Riot in November. Because it is required for the application due at the end of the month I am now an official tax paying business of the state of Texas! I'll will have more information on this Christmas craft fair soon as I will be making samples over the next couple weeks of new products that I will sell there. Some of the things I have in mind is Texas license plate ornaments, bottle cap wine charms, reclaimed wood bird feeders, and decorative Christmas wall hangings.

Because I had free time this weekend I was able to take photos of all my new products and will be updating my shop today. I am also back up and running on Twitter as you can see from the Tweets to your right. You can now follow me at: twitter.com/Taralee13

Here are a few things you can expect to see for sale on Etsy....

Vintage Charm Necklaces made with old keys, watch parts, brass locker tags, Milagros charms, and czech flower beads. I am also working on some charm necklaces made with old game parts such as scramble, monopoly, dominoes and jacks. I know these types of necklaces are very popular but I couldn't help myself when I found all these beautiful vintage pieces. They are all authentic vintage pieces I found in second hand stores with a few things bought from suppliers on Etsy.

Bottle Cap charm necklace with the tree of life, an owl and pearl. This was one I made for fun and I am working on a few more custom options with birthstones and family initials/names. I love working with the bottle caps because they are easy, colorful and unique. Here are a few other bottle caps pieces you can find for sale...

I used to sell note cards (mostly Christmas stuff) in high school. So when I came across an old atlas and this fun owl stamp it all came flooding back to me. I used the old atlas index to stamp on and cut out the owls and the maps to make these colorful everyday cards. I also have a variety of birthday and thank you cards. All the paper and envelops are recycled. You can also see the finished packages of recycled gift cards I made out of cereal boxes and fabric.

June 23, 2010

My New Shop Sign

Above is my sewing station I set up in the middle of our living/dinning room when I need to spread out and work on big projects. Below to the right is a detail of the letters I stitched onto scrap fabric I had left over from other projects. I used left over turquoise fabric from my new table covers to line the backs of each piece. On the left is my new Baby Lock sewing machine. Its a great little machine for basic sewing.

The finished sign for my craft fair booth. Its about 8-9 feet in length and the individual squares are 7"x9.5". I love how it turned out! I'm hoping it catches a few eyes at First Thursday next week.

June 9, 2010

BRAIDED NECKLACE

I didn't want to leave you hanging again so I thought I would share this is a great DIY necklace I found at ECAB - Eighteenth Century Agrarian Business, Make it Yourself blog. Click HERE for full instructions on how to make this piece. Also, check out some of the other great DIY projects including Urban Horse Shoes...I love these!

June 3, 2010

CRAFT PROJECT UPDATE

Once again I've been super busy this week making goodies. I've been considering making some doggy items to sell and donate money towards a local Boston Terrier or dog rescue. This is one of the things I've been working on with some scrap fabric I had laying around. Below are the instructions on how to make this simple embroidered wall hanger. Its a great project, even if your not a great sewer. Enjoy!


This embroidered wall hanger is a really simple project. All you need is a wooden embroidery hoop ($1.50 for an 8" at any craft store); some scrap fabric from the closet or store (can be white, colored or patterned); some embroidery thread and a needle. You may also need tracing paper if you are working with dark fabric.

First find an image you like. You can find something online and print it out at the appropriate size or draw something yourself. If you are working with an image online or a picture then make sure it is something you can easily trace into a recognizable outline, pattern or silhouette. If you have Photoshop and know how to use it, it is easy to convert your picture to a black and white image. You can also find predesigned cross stitch and embroidery patterns at craft stores. Either way your final product should be something that can be easily traced onto paper or fabric.

Since I was working with a thin, light fabric and a distinct black and white image I was able to tape the image and fabric to a window and trace lightly with a fine point fabric pen. If you working with a darker fabric or a detailed image you will want to copy it onto trace paper and pin it to your fabric. You will simply stitch the pattern through the trace paper and remove all pieces when complete. When your pattern is ready to sew, place your fabric on your embroidery hoop.

The next step is to start sewing. On this project I used a simple strait stitch because I wanted a fine outline, but there are all kinds of fun embroidery and cross stitches out there to use. If you are not yet a sewer or familiar with the different stitches click HERE to see examples.

When you are done sewing your image make sure it is centered and tight then cut off the access fabric. If you leave a small edge of fabric you can tuck it to the inside/back of the hoop and secure it with a hot glue gun. I painted my wooden hoop black and covered the back with black felt so it matched all my picture frames. This ended up being a nice touch and helped the image to stand out a bit. In all this project took me about two hours to complete including spraying the frame.

Here are a few other embroidery hoop projects to give you a little inspiration. I am particularly fond of the little hippo which was stitched with scrap fabric and felt on a sewing machine then placed in the hoop.


ReStyle ReUse ReDesign © 2008. Template by Dicas Blogger.

TOPO