March 29, 2010

SCRAPS TO TREASURE II

In continuing my research on Scraps to Treasure projects I found a bunch of great patterns, blogs and resources I’d like to share.

A lot of these patterns came from research Vicki of Simple Knits had done so please visit her site at SimplyKnits.blogspot.com and leave her a comment or two for all her hard work! She has a great blog that I now follow and am sure to read frequently.


For Fun:
Felted Fortune Cookies
Pocket Creatures
Fuzzy Lamb Toy (we raised lambs as a kid so I had to include this)

Fruits & Flowers:
Knitted Laurel Leaf
Felted Mushrooms
Knitted Strawberry

Housewares:
Crochet Cluster Flower (for larger projects)
Lavender Scented Heart Sachet
Felted Bowl
Colorful Dish Rags (saves you money!):
Dish Rag (1)
Dish Rag (2)
Oven Mitt & Pot Holder
Java Cozy (if you don’t use a to-go mug, at least save on all those paper sleeves with a stylish knitted cozy!):
Beer Cozy

Accessories:
Global Warming Mittens

March 28, 2010

GARDEN SPOONS

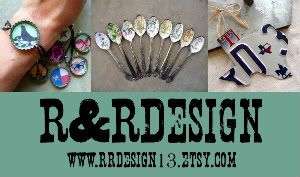
Still gardening, knitting my mobius scarf and coming up with more craft projects for Etsy. Just wanted to share with everyone the garden spoon markers I finished this weekend. I found old spoons at the thrift store, added text to images of vintage botanicals, printed them and sealed them on the spoons with several waterproof coats of clear acrylic. I love how they turned out! What do you think?


I'm also excited that the first of my seedlings sprouted yesterday...

March 25, 2010

Credit for Blog Header Photo....

What a great project! I was changing my blog layout today because I wasn't quite happy with it and as I was browsing for found objects with the letter 'R' I came across the photo above from Melissann at Flickr.com. Not only was I excited about the photo but the project as well. Most people, like myself, simply use printer trays to display knick-knacks but this one is artistic and personalized. I really like it - thanks Melissann!

DESIGN BLOGS

Back in December 2009 the Times published a list of the top 50 design blogs worldwide. Several of the blogs I follow happen to be on this list along with a bunch of other great blogs I encourage everyone to check out. You can find a few of my favorites below or in the 'friends and links' section to the bottom right.

Design Squish
Design Sponge
sfgirlbybay
Modish
Design is Mine
Wee Birdy

Once I find the right template and style for my blog maybe I'll make that list one day!! (or at least the top 100 ;)

March 23, 2010

STARTERS & MARKERS

I finally found enough time this last weekend to finish my starter seeds. I guess I’m still on Idaho time because I am now four weeks behind for spring planting in Texas. As you can see I used egg cartons and toilet paper rolls to create starter beds for the seeds. I found it helpful to tape sections of paper rolls together and label them with the type of seed. Because the cardboard absorbs the water I set them on a tray next to a window. Most of what I grow in my container garden is herbs for cooking and cut flowers. Since I lost almost all my plants to the Idaho winter and/or the stressful move to Texas I had to start from scratch. My basic shopping list includes:

Basil (trying a Lime Basil this year that I’m very excited about)
Oregano (great for making French bread)
Sage
Mint (got to have it for those summer time drinks)
Chamomile
Lemon Balm
Strawberries
Heirloom or African Daisies are a must!

I know what you’re thinking, “Where’s the good stuff like tomatoes and rosemary?” Well, as much as I love growing them neither of us eats many tomatoes and the other basic herbs like rosemary, thyme, celery and dill are not herbs I use frequently. I use Basil, Oregano and Sage for cooking because it suites my taste palette; and I use Mint, Chamomile and Lemon Balm for making drinks. I also found I’m more drawn to certain fragrances. For example, Common Sage reminds me of home in Idaho and Pineapple Mint has a refreshing summery scent. I suggest you pick the herbs or flowers you use the most or ones that have a special meaning to you because you’ll enjoy your garden a whole lot more.


Because I’m now in Texas I found cactus seeds are fairly common so I decided to try some for fun. Above is a picture of my little cactus growing garden I put together out of mini terracotta pots and an old bread pan. I actually got a little too creative and probably would have been better off just spreading the seeds in the bread pan. However, it actually worked out to my advantage because unlike most seeds the cactus pots must be covered with glass during germination to create a greenhouse effect. I didn’t have a piece big enough for the bread pan but due to a recent household accident I had several smaller pieces of glass that fit over the terracotta pots perfectly. I’m hoping in a couple weeks I’ll have cute baby cactus like these that I can arrange in other indoor/outdoor pots to make cactus gardens.


While I’m waiting for my seeds to grow I decided to work on another project making garden markers. I simply started by researching on Etsy what other people were making and found one I wanted to recreate myself. If you don’t have time or resources to make your own, here are a few suggestions to buy garden markers:

Set of 10 Cooper Plant Markers at Takit $23


Rustic Ceramic Markers $10 each


Engraved Silverware Markers $6-8 each

Hammermann
Wooden Hive

And my favorite handcrafted garden markers by Daisy Chestnut $8-12 each.


I’m attempting to make something similar but with images of vintage botanical prints. I’ll let you know how they turn out!

March 19, 2010

FROM SCRAPS TO TREASURE

I apologize for not writing much this week but I have been slightly under the weather and lacking energy. However, I’m starting to feel better and would like to share a quick project with you. Recently, I set my mind to making a dog sweater for my Boston terrier, who loves to strut around in his outfits, out of scrap yarns I had left over from Christmas projects. I measured his neck, chest and back and just started a basic pattern from scratch. I couldn’t quite get the adding and subtracting stitches down so I just ended up with three pieces of strait knit that I wove together and added buttons for decoration. I was pretty proud of it and he seemed to like it too so I set out to find other dog outfits, cat toys and projects I could make with scrap yarns.

What I found was that Knitting Pattern Central and Crochet Pattern Central had already done the work for me! They have a ton of great dog and cat projects, many of which can be done with left over scraps.

A few of my favorites I found on their lists include:
Button Dog Sweater
Leafy Dog Sweater
Doggy Bones
Felted Mice
Martha’s Sharkey Sweater (you may have to create an account to view this pattern, however, I highly recommend it because Lion Brand has a ton of free knitting patterns available online as well as in craft stores)
Crochet Cat Bed

March 16, 2010

HOW-TO TUESDAY

There are some create how-to projects at Etsy.com for their How-Tuesday series...click here to check it out. While you're there don't forget to check out my new spring products for your own crafting inspiration!

March 15, 2010

SPRING IS IN THE AIR

And for me that means potting plants and gardening crafts! To my delight spring comes early here in Texas, as it does in many of the southern states, so I’m ramping up to enjoy some new potted herbs and flowers. Since I live in an apartment and don’t have a garden of my own yet I rely on container gardening. I’ve collected quite a handful of ceramic and terracotta pots over the years on sale but as my love for gardening has grown I’ve started looking for ways to expand without spending a lot of money. One of the cheapest and most effective ways to grow potted plants both inside and out is to use soda bottles or milk jugs. They are especially great for flowers or vegetables that need a lot of moisture because the base can retain extra water that is wicked back into the soil as it gets dry. You can also use soda bottles in your garden or containers to help conserve water by keeping moisture near the roots. Check out the “Scrooge Bottle” at Instructables.com.

If you know where to shop you can usually find starter plants, vegetables and herbs for a reasonable price, but the cheapest way to fill your containers is by making your own starters from seeds or cuttings. By making your own starters you can get exactly what you want by picking out the type of seeds you want rather than depending on what the store has available. If you’re like me and only have a few containers, not a whole garden to fill, you can share or trade your favorite seeds with your friends and family or save them for next year (Note: making starters and gardening can be fun for everyone. Make an afternoon out of it with ice tea & mint from your herb container). Egg cartoons, egg shells, toilet paper rolls and newspaper are just a few of the many household items that make great starter containers. Not to keep talking about soda bottles, but they also work great in creating mini greenhouses to assist starters in growing.

Okay, I’ll keep talking for just a moment because used soda bottles can improve your outdoor experience beyond planters. They can be used to make:
* Bird Feeders
* Insect Traps
* Windproof Candle Holders
* Ice Packs for your cooler (simple fill bottle 80% full of water, put lid on and freeze overnight)
* and even a Garden Trellis!

Just to name a few.

Container pots come in all shapes, sizes and colors. You can pretty much turn any household item into a container garden with a little creativity. I’ve seen bathtubs, sinks, old toilets, barrel drums, mason jars, reclaimed wood, shoes, buckets, old crates, burlap sacks, etc. One of my personal favorites is using vintage tin cans. They are just as bright and festive as the flowers planted in them. You can usually find cheap vintage tins at thrift stores or your grandmother’s attic if you don’t have any of your own lying around. If you want to be even more cost effective and environmentally friendly, you can simple use your recycled tin cans saved from coffee, soups and sauces and either paint them and/or embellish them with vintage pictures printed from online. Mix a few tin planters in with other ceramic or terracotta pots to make a colorful statement.

Another popular recycled gardening container is tires. If you live in an apartment I do not recommend throwing tires and dirt in your front yard without permission from your landlord because it will kill the grass. However, if you’re looking for a larger planter for your patio or deck you can place a tire ontop of a scrap of plywood (cut circular to fit the base of the tire) and elevate it with feet, another tire or tire rim to keep it from damaging the patio/deck surface. You can find some great tire planters and instructions at Wuv’n Acres Gardens.

Don’t forget container gardens for inside your home! More on that topic another day.

March 14, 2010

Simple Moebius Scarf

I’ve done a lot of basic scarves and cowls with knit and pearl stitches, cables, etc. but this is the first I’ve branched out and used a true knitting pattern. I find patterns are sometimes hard to read if you are not familiar with all of the terminology and abbreviations. Once I understood what this pattern was asking it was really easy. This pattern is used to create a continuous ring of knitting with a twist known as a Moebius scarf. It can be worn double-wrapped around the neck or around the neck and over the head. The pattern creates a series of eyelets that look very elegant with the lace weight yarn. However, I am used to working with heavy weight yarns and find the lace yarn a little harder to work with because it separates. As you can see from the photo I’m not quite done with the project but I’m very excited about how it’s turning out and would like to share the pattern with everyone. Feel free to join me in making a Moebius scarf or share other similar projects you’ve done.

What you need:
70-141 grams of 2.5-5oz lace weight yarn
10-1/2 US/6.5mm needles

To start you will case on 40 stitches with an invisible cast on. I was not familiar with an invisible cast on but found a great video at KnittingHelp.com. You work the pattern below to the desired length (26” recommended for standard length or 50” for longer length to double wrap). When complete you will work the loose needle back into the invisible cast on stitches so that the point is facing in the opposite direction of the needing you left the finial row on. Remove the holding yarn. Bring the two needle points together, creating a twist in the scarf, and weave a seamless join. To make sure the pattern is seamless, finish on row 8.

Pattern:
Rows 1, 2, 3: k to last 2 sts, bring yarn forward and slip last 2 sts purwise.
Row 4: k5, yo, k2tog, *k4 sts, yo, k2tog and repeat from * until you have 3 sts remaining, k1, bring yarn forward and slip last 2 stitches purlwise.
Rows 5, 6, 7: same as row 1-3.
Row 8: k8, yo, k2tog, *k4 sts, yo, k2tog and repeat from * until you have 6 sts remaining, k4, bring yarn forward and slip last 2 stitches purlwise.

K = knit
Sts = stitches
yo=yarn over/bring yarn forward
k2tog = knit two stitches together

Enjoy and Have Fun!!

March 11, 2010

BOOK REVIEW I

REMAKE RESTYLE REUSE
Sonia Lucano

I got this book on sale a couple of years ago and I highly recommend it! It is a beautiful book, packed with loads of information, pictures and patterns for not a lot of money. Typically I do not buy craft books just to copy the exact project shown so I can’t say that I’ve actually completed any of the craft projects presented in this book, but I have taken full advantage of the tips, ideas and patterns provided and used them as inspiration in creating other unique crafts. If you ARE one of those who likes working off a pattern and instructions, this book is diffidently for you! It is loaded with great photos and artistic sketches that illustrate not only the finished products but the steps and materials used. For almost every project there are letters, text, patterns or images that you can photocopy, mirror or enlarge and use to create the projects shown. The letters, text or patterns are also great to use as inspiration for other projects not shown in the book.

Most of the projects presented use newer materials or objects such as Ikea paper lights, plates or glass vases. The book does make recommendations to use scrap linens and or used jars when appropriate. To keep your projects cost effective and eco friendly I recommend taking their advice and finding your supplies at thrift stores or simply use the patterns to spruce up your own home accessories, pillow, linens or kitchenware.

Here are a couple excerpt instruction and patterns from the book to give you an idea of the style and detail of information provided:


Book Description:
Paperback: 144 pages
Publisher: Watson-Guptill; illustrated edition edition (April 29, 2008)
Price: $12.50 used -$13.50 new

From Random House Inc: Transform basic items into boutique-worthy home décor. We’ve all got the furniture and the home accessories we can afford. Our stuff came from Target, or Ikea, or Pottery Barn, or Dan’s Dent-and-Ding Depot. Wherever it came from, it’s pretty vanilla. Wistfully, we look through the windows at tony boutiques, admiring the little hand-painted chest, or the exquisite artisan vase, or the beaded curtains, and we ask, “Why was I blessed with such fabulous taste, only to be constantly depressed because these beautiful things are out of my reach financially?” Good news! With ReMake ReStyle ReUse, anyone can create 40 stunning, sophisticated home items, just like the ones in those high-end shops. Only the most basic craft skills are assumed, and everything is provided, including simple step-by-step directions, designs to trace or photocopy, and glowing photographs for instruction and inspiration.

Other similar books to try:
1000 IDEAS FOR CREATIVE REUSE: Remake, Restyle, Recycle, Renew
Paperback: 320 pages
Publisher: Quarry Books (November 1, 2009)
Price: New or Used $16.50

March 10, 2010

BOTTLE CAP CRAFTS

Since bottle caps are my new favorite thing to craft with I thought I would start off my new blog with a bang and share some inspiration with you. I discovered the fun of using bottle caps to make jewelry and crafts over a year ago. Since then it seems bottle caps are the new rave in the eco crafting world and you can find all kinds of amazing project ideas online. The most basic projects seem to start by gluing images, charms, glitter, etc. onto the back or inside of a bottle cap. From there you can go about anywhere: jewelry, accessories, decorations, and even furniture!

From what I can tell the trend of up-cycling bottle caps started in the back rooms of free spirited crafters like myself and as the movement of ‘being green’ grew popular over the last few years, eco friendly crafts started coming out of the back rooms and into the mainstream. You can now buy bottle caps in bulk from some of your favorite suppliers and other crafters are starting to make printable digital art in 1” circles just for making bottle cap projects. However, in order to maintain bottle cap tradition in the true style of ‘green’ I do not recommend buying your caps in bulk. Instead, ask your friends or local restaurants/bars to save all their bottle caps for you. This way you get vintage looking caps in a variety of colors and styles. If you’re collecting your own caps at home, there are many bottle openers out there that will not damage the integrity of the cap. But don't get too discouraged if you find a little ding or bend because it will just add to that recycled look.

In order to rate the difficulty of projects shown on this blog I’ve created a scale from 1-5; 1 being the easiest and 5 being the most difficult. The ratings are typically shown in number of stars ★ after the title or header of a project.

Stars out of 5:
★=simple basics
★★=pretty straightforward
★★★=somewhat complex
★★★★=ambitious
★★★★★=grueling!

BOTTLE CAP JEWELRY is the most common item made with bottle caps next to magnets. The basis for making jewelry is the basis for making most bottle cap crafts. A lot of people choose to leave the bottle caps in their original form and take advantage of all the neat colors and styles available. However, if you choose to spice your bottle caps up here are a few basic steps:

1) First punch holes where you want your rings or beads to go. This can be done with a drill and small bit (1/16” or 5/64”), with a tool designed for punching metal, or a hammer and nail.
2) Install rings and beads and/or wire to hang your chain, bracelet or earring parts.
3) Using decoupage glue, similar to Mod Podge, adhere your images, charms, glitter, etc. onto the back or inside of the bottle cap and let dry.

At this point you can finish by adding your chain, hooks, etc. or if you choose you can fill the inside of the cap with an epoxy to make your piece more durable. I use a two part epoxy because it emits fewer odors and is more forgiving then acrylics or resins. Here are some great examples of bottle cap jewelry.

Earrings ★


Necklaces & Bracelets ★★


If you want to get really creative you can make more elaborate jewelry such as these avant-garde pieces by designer Yoav Kotik. ★★★


BOTTLE CAP ACCESSORIES & DECORATIONS are also fairly easy projects that make great gifts for friends and family members! To create any of these projects you can start by following the same basic steps as making jewelry.

Key chains & Magnets ★


Holiday Ornaments and Gift Tags ★


Bottle Cap Belt ★★


Picture Frames ★★


Or Mirrors of the more decorative nature! ★★★★


Bags/Totes ★★★


Bouquet of Flowers ★★★


BOTTLE CAP FURNITURE is a trend I believe started with the fraternity boys collecting drinking trophies and making beer pong tables. However, I myself have dreamed of making a bar top out of bottle caps and wine corks someday so I would like to take a moment and pay tribute to all those creative bachelors out there. . .


And last but not least, bottle caps as a piece of art! ★★★★★

March 7, 2010

BLOG INTRO

As the description says, this is a blog all about crafting and decorating with the environment in mind! My name is Tara and I recently started a small jewelry and craft company called R&R Design. I am an Idahoan born and raised but I recently moved to Austin, TX and while seeking full-time employment I decided to sell my jewelry and reclaimed crafts at www.Etsy.com. I’ve been crafting since my grandmother taught me how to knit and sew in junior high. I love taking photography, scrap booking and stamping, knitting, quilting, and making jewelry out of anything interesting I can find lying around. I love working with all kinds of materials but particularly ones that are reclaimed or environmentally friendly. Most of my jewelry is made out of used bottle caps or old license plates. I’ve also made CD storage boxes, wind chimes, bird feeders, decorations, office organizers, and even furniture out of reclaimed objects. I created this blog so I would have a place to share these crafting ideas and resources about all the things I love to do, books I’ve read, great websites about crafting or green craft projects, etc. My background is in Interior Design so I also hope to share tips and ideas on how to decorate your home with your handmade crafts and other environmentally friendly and thrifty products. Please feel free to contact me about any of the projects, reviews or information provided on this blog. I am always looking for feedback on my projects and other tips or new resources so don’t be afraid to comment or contact me. Also, if you love crafting like me and are interested in contributing to the blog, whether it is on a one time basis or more frequently, just send me an email at RRDesign13@gmail.com.
I hope you can find some of the information here useful in your own crafting and decorating world!

ReStyle ReUse ReDesign © 2008. Template by Dicas Blogger.

TOPO